by
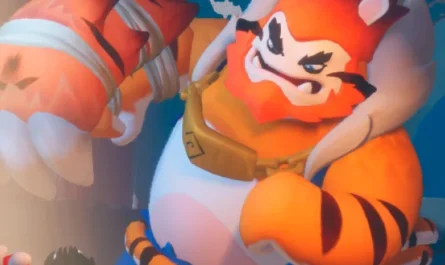
by The Jester is one of Constance ‘s bosses , and I must say that he’s currently one of the trickiest bosses in the game, though I wouldn’t call him terribly difficult, to be honest. He’s definitely a bit maddening.
Although this might be a bit… off-topic, I have to say it: Could this be a cousin of Jevil from Deltarune ? Because he looks exactly like him. There’s a high probability it’s a Deltarune reference , to be honest.
Review of Razor Shark slot by Push Gaming
Anyway, getting back to what’s supposed to be interesting (I wonder if anyone cares about my ramblings), he’s a very peculiar boss (in a bad way) because his movements have a semi-random element (he’s a deck of cards boss, that’s what you get) and some of his moves are quite annoying. He likes chaos, like I said, he’s 100% Jevil’s cousin.
Boss Location: Chaotic Carnival

As you can see in the image, the link is to the Astral Academy area (blue-purple zone), but this link is also connected to a link to Catastrophic Crossroads (red zone). The photo makes it easy to find, but I’d recommend leaving this area for last (you know, of the four Tears, this is the last one). This new orange area is the entrance to “Chaotic Carnival . “
Once there, after marveling at the beauty of this area, go all the way to the right, where you’ll find a Sanctuary to rest in, and a little to its left, the typical circus tent. Go inside; that’s where the Jester awaits you.
The Jester’s Attack Guide
The Jester has a unique attack mechanic. He’ll start by showing you four cards, and you must hit one of them. Depending on the symbol that appears (spades, hearts, etc.), he’ll perform a different sequence of moves.
After the sequence, one card (the one you drew) will disappear, and you’ll have to choose from the remaining three. This process continues until you’ve chosen all the cards, at which point the boss is completely exposed , and you can take advantage of the opportunity, as always, to give him all your love with the paintbrush.
Diamonds
In my opinion, their easiest set of attacks to dodge:
- Diamonds Below : Short and long groups of cards appear, moving across the screen along the ground. The short ones can be jumped over, while the long ones require a jump and air dash .
- Diamonds with a Ceiling : A row of diamonds runs across the entire screen above your head, preventing you from jumping if you don’t want to take damage. Meanwhile, cards appear at ground level that you’ll have to avoid by dashing on the ground.
- Diamonds on Both Rows : You have sets of diamonds that run along the row above your head and the row at ground level, but in opposite directions. The key is to follow the direction of the bottom row and, when you can (when the top row isn’t above you), jump in the opposite direction. The attack will become more complex, and you’ll have to use the dash ; in the last set, for example, you’ll need dash + dash + jump (opposite direction) + air dash .
Spades
Slightly more complicated than their previous set, you’ll need to be very focused:
- Triple Spade Together : You’re being chased by 3 spade cards that are very close together. The easiest to dodge: dash near them to pass through them and you’re done.
- Crossing Spades : Two or three cards appear towards you from different directions, aiming to cross your position. The best thing to do is jump; in most cases, if you time your jump well, you can avoid the attack, and in the worst-case scenario, you have the dash .
- Individual Shrapnel Spikes : They appear one at a time from different directions and quite quickly. Dodge each one with a dash when it’s about to hit you; jumping is useful when they travel more or less along the ground.
Clovers
The worst of all, without a doubt:
- Side to Side : Cards fall from the ceiling one by one, from one side of the screen to the other. Use the dash to pass through the card as it falls to the ground.
- In groups : Some groups of cards fall, others rise. You’ll have to find an open space to avoid taking damage.
- The Weird Move : Difficult to explain, but here goes. You see, he’ll arrange the cards in a way that will make you think, “It’s physically impossible to dodge this,” and you’d be right. You have to stay put until he makes a card move that reveals an escape route. Of course, you’ll have to use it.
Hearts
This is the best move you can get, as it will deal some damage to the boss. It always appears third (out of the four available, always the third). After this, the boss will automatically launch its last remaining attack.
Extremely important – 4th Attack of the Sequence
Right after you choose the heart card, the fourth attack in the sequence will begin, and it will be of the suit (card suit, mind you) that you haven’t drawn yet. However, in this fourth attack, there’s a noticeable change that alters everything, and if you overlook it, you’ll never beat this boss .
In this fourth move, corrupted cards (black with white edges) will appear, and you must hit them with Brush Thrust, specifically three of them (they will appear one by one). It is when you do this that the boss is exposed. If, after a while of this fourth sequence, you don’t hit three corrupted cards, the boss will show you the four cards again, and you will have to start the cycle over .
Additional Tips
Now, here are a few tips that might be very useful in this fight:
- As always, Sustenance Inspiration is great for healing a bit of health when using Brush Thrust. It’s the ability you should use by default when hitting cards to heal yourself a little (plus, the cards are corrupted).
- Dark Embrace is another Inspiration that’s incredibly useful for avoiding damage when dashing while corrupted. This allows you to dash as much as you want , but be careful not to use Brushstroke while corrupted.
- When the Jester is stunned, use the typical combo of 3 normal attacks + Brush Thrust. You’ll do more damage and heal yourself a little with Sustain.
- Precision Brush (another inspiration) is also recommended to increase the damage of normal attacks. Dealing significant damage while stunned is key to avoiding having to attack during three stunned rounds instead of the two you could achieve with good damage output.
Rewards for Overcoming the Battle
When you defeat him initially, you’ll only get some Glimpses and Light Stones. Don’t worry, as soon as you advance a little (nothing, maybe a minute) you’ll get a new Brush Technique called Dive Down .
This ability allows you to perform a downward dive attack (common in many games). This lets you safely bounce off damaging objects like spikes and enemies; in the case of enemies, you’ll also damage them, of course.next boss
And that’s it! What did you think of the fight against The Jester in Constance ? Did you find him one of the most difficult bosses so far? Did you enjoy the Plunge? Leave a comment!