 by
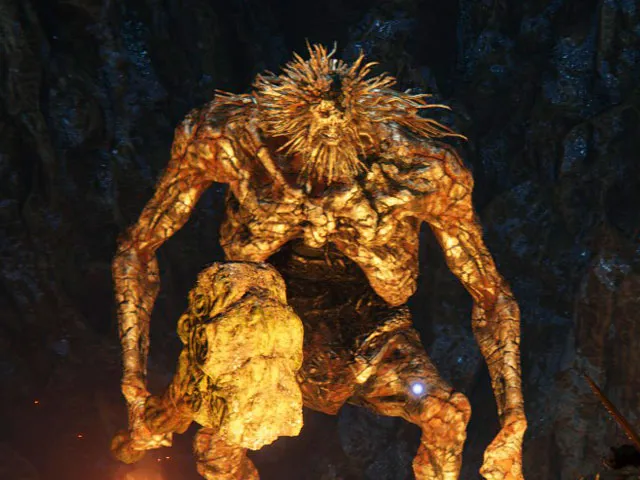
by The Stone Excavator Troll is one of the bosses of the first zone of the Elden Ring (Necrolimbo) and this makes me have doubts about whether to categorize it as a difficult boss or one more of the bunch because although it is true that I consider it to be relatively easy, it is also it is that a small mistake can mean a quick death and that adds a lot to its difficulty.
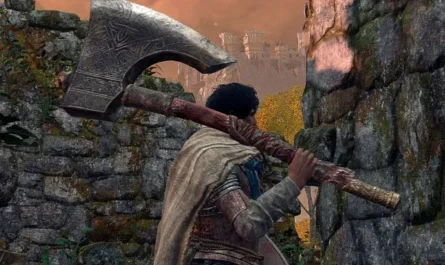
It is a huge giant (although in size, I think the Guardian Golem surpasses it ) with very tough skin (which will be something that we will have to take into account) and a mallet of colossal size with unparalleled power and reach. . In terms of power, there is no doubt that he is a boss to be feared, but on the other hand he is quite slow and that is something that benefits us a lot.
The case, let’s go with the guide!
LOCATION: NECROLIMBO MINE

We will find the Necrolimbo Mine in the swampy area that we have in the Eastern area of Necrolimbo, which is represented as a kind of large lake on the map (where we find the powerful Agheel by surprise, which we will leave for a little later).
The Mine itself is located right where I mark you on the map, accessible from the swampy area, not from the upper area, keep that in mind. There we will have to investigate the Necrolimbo Mine (a very interesting area since we will find quite a few Forge Stones [1] and [2] (so Elden Ring names them) and even some Forge Umbrastone.
The only complication that you will find on the way to the boss, apart from enemies and others, is that there will come a time when you will have to jump from the elevator (halfway to its destination) to access hidden paths, in one of them you will end up finding the Troll Excavator stone.
STONEDIGGER TROLL ATTACKS AND STRATEGY
Stonedigger Troll is pure power, but it’s pretty slow. His attacks have an absurd range and therefore you will have to be very careful and most of the hits that hit the ground will also cause effect damage so it will be ideal to get far away from the impact zone.
Here are some tips that will come in handy:
- As strange as it sounds, it pays more to stay close to him than to keep your distance because his mallet has so much range that it will not take him too long to hit you and being close is easier to dodge. This also prevents him from using part of his offensive arsenal.
- Being close to him means that he will constantly step on the ground, which is what you will have to keep in mind because he will do it very often and it is a fairly fast attack. It will be enough to dodge at the right moment, even dodging the blow itself generates an area of effect that could cause you some damage, but it will be negligible when compared to the damage you would receive if you didn’t, of course.
- Most of his attacks are easy to dodge as long as you keep in mind that he is somewhat slow and therefore you will have to be patient when dodging and wait for the blow to be effective (it takes a while); similar to what happened to us with the Sentinel Agreste , let’s go.
- It has very hard skin and therefore our blows can bounce, this leaves us more exposed and on top of that it will reduce the damage we do. The key is to make the powerful attack since it penetrates better; jump + power attack comes in handy in this battle. In the face of light attacks, don’t use them here.
- In terms of healing, it is so slow that most of the time if you heal as you receive the damage, it usually gives you time between launching your next attack. If you are in a hurry you can take some distance to quickly return, but that said, getting too far away from him is more problematic than anything else, it is better to stay close no matter how strange it may be.
Regarding his attacks, we have already mentioned the most important thing that would be the areas of effect when he hits the ground (either with his feet or with the mallet), otherwise he has the typical: Arm blows, more “horizontal” mallet blows » (that do not go to the ground, come on) that do not require much explanation because they are easily dodged.
But we cannot forget to mention an attack in which he goes completely crazy (which he usually does if you move away precisely) and begins to hit multiple times with the hammer; if he does it to you, get out of his way and wait for him to finish because it’s a very long combo with a huge area of effect and as soon as it hooks you it will destroy you.
REWARDS
By defeating him we will obtain the following:
- Roar Medallion : A Talisman for Skyrim lovers as it will improve roar and breath attacks (we have for example a Dragon’s Breath Charm in the Church of Dragonborn Communion ).