 by
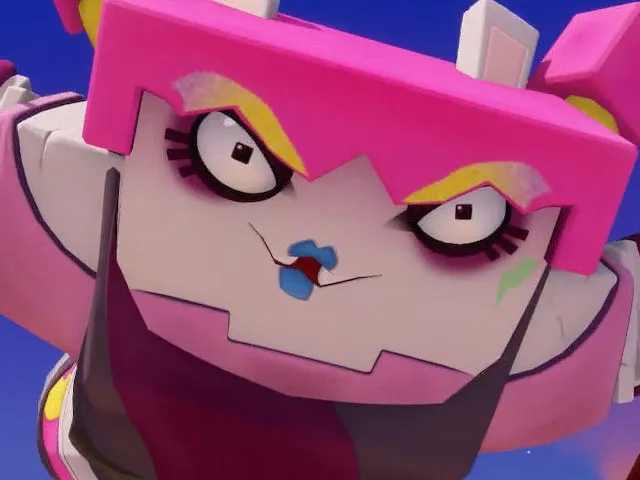
by Pedrisca is the third boss of the main story of Mario + Rabbids: Sparks of Hope and the truth is that it is probably the easiest boss we have faced so far, what is certain is that it is very important to have a certain thing in account as otherwise it will be a nightmare to get over it.
In addition, as has happened with the previous bosses of the main story, we will once again have a new character in our roster of characters. This time it’s about Bowser, a character I’ve been trying out and the truth is that he just didn’t convince me; Be that as it may, in this battle we will have to use him yes or yes, but he will not occupy one of the 3 slots we have for characters on the battlefield, so we can carry 4 characters.
BOSS LOCATION: PRINCIPALETA
The battle against Pedrisca will take place in Principaleta (the third map of the game). Since it’s part of the story, it doesn’t have much of a mystery, it’s just advancing it and eventually you’ll get to her battle. I warn you anyway that you will have it for the final part of the history of that world.
RECOMMENDED EQUIPMENT
This is the equipment and the Sparks that I recommend for this battle, there will be few changes compared to the equipment that I mentioned in the previous boss because this is the configuration that works best for me in general terms and that is why I recommend it.
- Luigi : The always highly recommended Luigi. Build him into shots and technique (and max out his range of motion, which is critical).
- Denterio : The passive increases the damage of weapons and the active will push away enemies in range. It’s more for the passive than anything else, we rarely have to use the active because the idea is that Luigi is always away from the enemies.
- Reflector : The passive increases the Critical Chance and the active will reflect part of the damage that the character receives in that turn. Again it is more for the passive, since Luigi in shots has Critical Damage enhancement, since the Chance is phenomenal for him to deliver some tremendous blows.
- Mario : This time we can build it into movement just the way I like it (since you’ll have plenty of points, also add Shooting and Technique).
- Etherium : Passively enhances Movement skills and when activated we will be invisible for x turns (depending on level). This prevents them from attacking us to move towards where we want safely (we do not lose invisibility when attacking, but area attacks can damage us).
- Exoshield : The passive is like Eterio but the active reduces the damage taken from characters in the area for 2 turns.
- Rabbid Mario : Build it up to weapons and movement to deal maximum damage. As I said before, the ability to move after attacking with weapons is essential.
- Blast : His passive reduces the physical damage that the character receives, but the good thing is the active one since it will greatly increase the damage caused by all characters in the area for 1 turn. It’s great for a brutal burst .
- Glow : A brutal Spark for Rabbid Mario. The passive increases weapon damage and the active will bring enemies closer to the character. Ideal for them to get close to it and destroy them with their attacks.
As always recommend Rabbid Peach in case your characters die, something that shouldn’t happen anyway.
HOW TO DEFEAT HAILSTONE

Instead of Rabbid Peach use Mario, I guess I used her in another mission to heal myself and that’s why she’s in the photo. Remember that the recommended configuration is Mario, Luigi, Rabbid Mario and Bowser.
We have Pedrisca in the center surrounded by Goombas, on the diagonal sides (where there are orange leaves) are the 4 explosive zones that we will use to defeat him, our characters behind and Bowser in front of Pedrisca.
Start using Bowser’s technique, so you will get rid of all the Goombas that surround Pedrisca and after this go back with Bowser towards the area of explosives that you have in the lower right corner looking at the photo. After this the idea is to finish with all the additional enemies, Mario and Luigi (use Luigi as a springboard to do jumping abilities with Mario and activate his invisibility so that they cannot attack him) can take care of the area on the left and Bowser and Rabbid Mario from the area on the right for example. You should finish them off quickly, so use Slam and whatever you have on the first turn. Activate Luigi’s technique whenever you have it available so that he can clean up, many times he will attack Pdrisca and you will do him little damage, but it will be good for you to lower his life a bit.
As soon as we are free of enemies, attract Pedrisca to the area of explosives that you want, I preferred to opt for the lower right area. In any case, bring Luigi closer to the area on the left, which will come in handy later. When you attack him he does a ground slam and then moves around a bit; if he does it in the explosives you will cause brutal damage and the entire floor of the area will fall (even if your characters fall you will hardly notice it).
After this, take him to the area on the left to do the same, you already have Luigi there, so it will be easy to attract her as the other characters approach. To defeat it, 2 explosions will suffice, the little life it has left (if it has left) lower it with normal attacks that, even if they take a little, it will have so little life left that you will lower it that turn or at most the next. If you take time, portals will appear, you see dealing with them that can destroy the game.