 by
by If you, like me, like to have parts of the game collection installed, the fast storage space that is permanently mounted in PlayStation 5 can run out pretty quickly. A few months ago, a software update was finally released that allows for expansion of storage space by installing an SSD that matches the speed of the built-in.
In this guide, I will tell you what to consider when buying a disk and instruct you step by step how to install and initialize the expanded storage.
The things to keep in mind when buying a disk are the following:
- It must be a disk with the interface “PCIe Gen 4.0 (x4) M.2 NVMe SSD”
- It must currently have storage space of 250GB, 500GB, 1TB, 2TB or 4TB
- It must have a built-in heat sink, otherwise you will have to install one yourself
- It must be able to read at least 5500MB / s sequentially
- Supported form factors are 2230, 2242, 2260, 2280, 22110
- Maximum total size including heat sink is 110 x 25 x 11.25 millimeters
Step 1 – Preparation
Make sure your PlayStation 5 has the latest software by running a system update. Then turn off your PlayStation 5 completely, ie do not sleep. Unplug all cables and allow the console to cool.
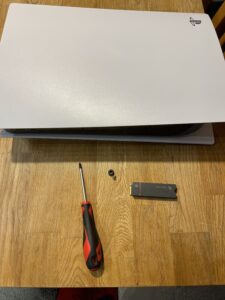
Place the console on a flat work surface and pick out a cross screwdriver with a rather narrow and pointed head. If you do not have a grounding bracelet, touch any grounded metal object, such as an element, to prevent static electricity from damaging the console or SSD.
Step 2 – Open the expansion port
Lay your console with the PlayStation logo facing down and the power button on the left. Carefully lift the shell at the top edge and pull it towards you until it comes loose.
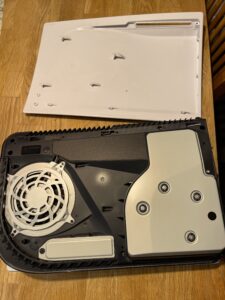
Unscrew the screw that holds the expansion port cover in place. Loosen the lid using your chisel or screw. The nails were not enough for me.
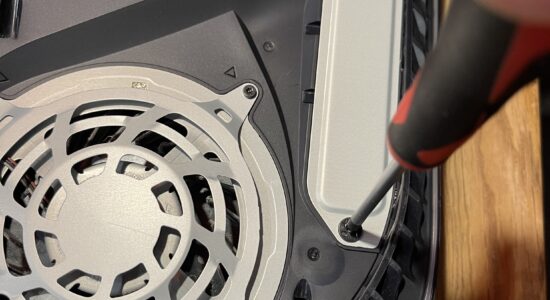
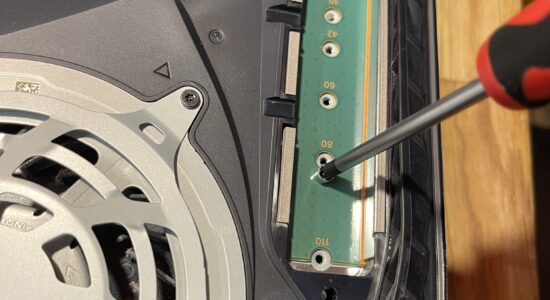
Loosen the screw located inside the expansion port.
Drag the shim cylinder to the location that marks your device’s form factor. For me it was a 2280 and then the insert should be on the spot marked with 80.
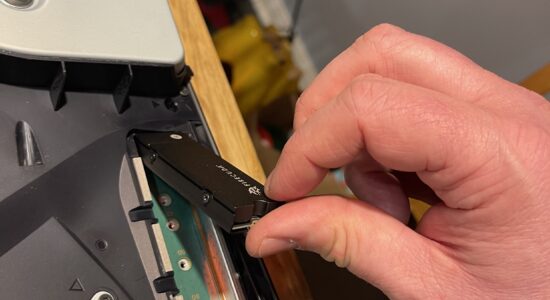
Step 3 – Mount the disk
Hold the disc diagonally facing upwards and gently push it all the way in at the connector.
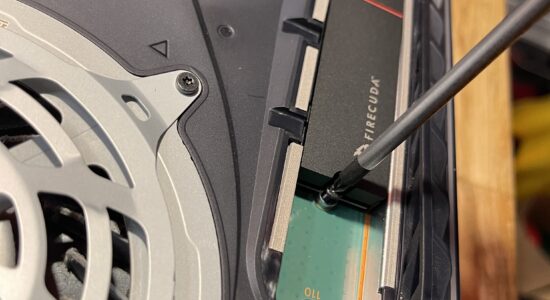
Place it against the liner and unscrew the screw to hold the disc in place.
Step 4 – Close your PlayStation 5 again
Put the expansion port cover back on and unscrew the screw that holds it in place.
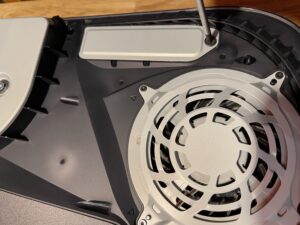
Replace the outer protective plastic with the brackets in the slots and press it into place until it clicks.
Step 5 – Configure your new device
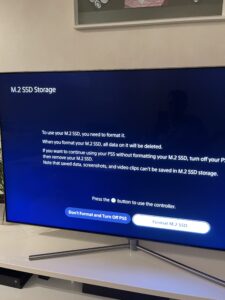
Replace all cables and restart your PlayStation 5. Now a message appears stating that your new device needs to be formatted. Select the formatting option and wait for it to finish.
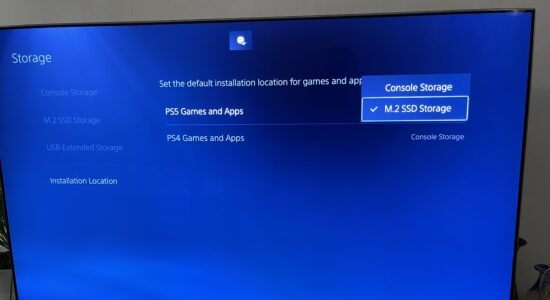
Go to Settings-> Storage -> Installation location and select your new device if you want PlayStation 5 and / or PlayStation 4 games to be installed on your new device.

Now it’s just a matter of honking and driving with the same or better performance than the built-in, fast storage.