 by
by After creating the Bee House in the previous post about Minecraft constructions (which I recommend you see because that house was amazing) I have come up with another house idea related to bees.
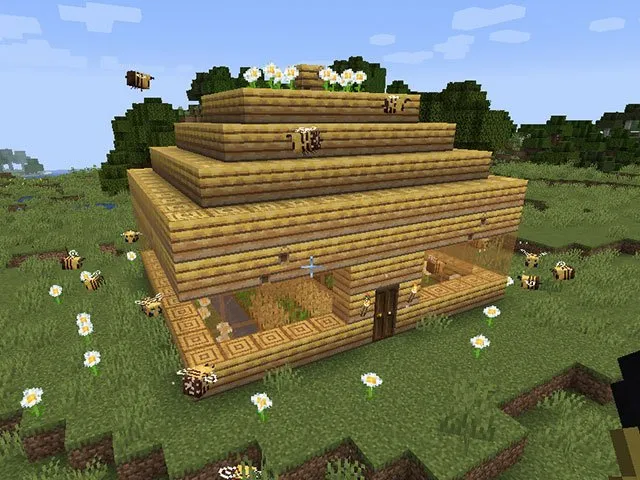
This time it will not be a house that literally has the shape of a bee, but I have decided to create a kind of house with an interior garden and with the appearance of a beehive, which I have baptized as the ” Hive Garden “. I think that it is actually a very useful building, since the crops can provide us with interesting things like food and also the bees will be in charge of pollinating them so that they grow much faster.
The decoration is beehive style, but obviously you could get the same result with stone, wood or whatever… but personally I think the “Beehive” style is what suits it best.
Well, I explain step by step how to do it below:
Table of Contents
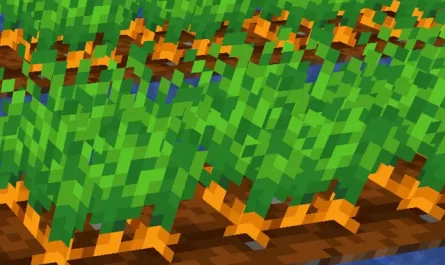
CREATING THE CROPS

As I suppose you already know, you must use the Hoe to be able to plow the soil and make it ready for the crops and you must also put water around it to hydrate the soil, something also necessary for the crops to go ahead.
I have created it with this design, even as you will see later at the end I have also decided to put water on the top, what would be missing to create the “C”, right now it is an “L”. I did this because, as you can see, there was an area where the soil did not hydrate well for some reason.
Let this serve as an orientation, you do it as you prefer.
THE BASE OF THE BEEHIVE GARDEN

Now you must add the floor just as it is in the image, I have always liked the oak wood a lot. Do not forget to add the flowers on the sides, in my case I have added daisies, they are necessary for the bees that we will add later to pollinate.
CREATING THE HIVE

The structure should be more or less like this, I have added double space for the windows since I have always preferred houses with huge windows.
Here be very careful with the hole part of the hive . A Hive block always has a part with the holes that the Bees enter through, this part always appears facing you when you place them.
Try to leave some holes facing out as you see in the photo and others facing in. This way the bees will be able to enter and leave the hive.
After this we will add several details to finish polishing the Hive on the outside.

I’ve added orange windows as I think they look the best, a dark oak door and a couple of torches for lighting.
HIVE ROOF

For the roof, simply do as in the image, it is basically increasing the roof by one level, always leaving a block of margin on all sides several times.
On the roof it is quite good to add this small garden with its Beehive to have a few bees swarming on the roof .
THE INTERIOR OF THE BEEHIVE GARDEN

As you can see, in the end I have retouched some things at the base to have more water and more flowers also at the bottom of the garden. I have added a chest to store the harvest and several torches to light up the room well.
You will have to put a few Bees inside and you will see how quickly they begin to pollinate your crops so that they grow much faster. In the photo you can see that things are already advancing and if there are crops so advanced compared to others it is because of the Bees .
Note that, as I mentioned before, I have left some Hive blocks with the holes pointing towards the inside of the house, do not forget about it.
And now to finish, there is only one detail left for you to have the house surrounded by bees like the one you have seen at the top of this post. Basically add a bunch of flowers outside and bring a few bees to hang around the area, the result should look similar to the photo!
But as I always say, this is just an idea, surely you can create something infinitely better. If so, I would love to know or if you send me a photo, if it has turned out very well, maybe I will put the photo in this post.