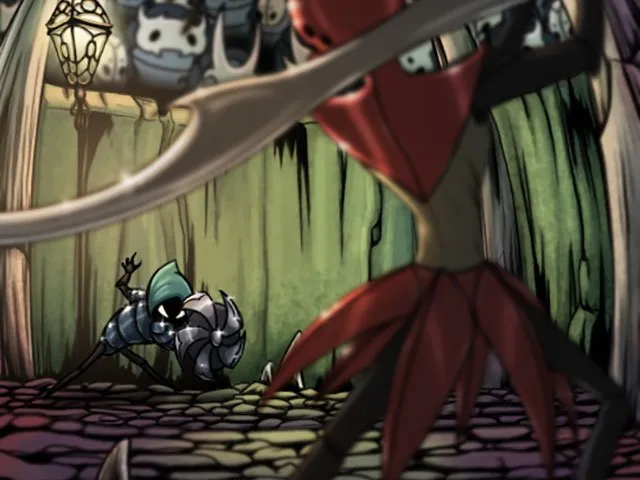
The Fool’s Coliseum is a place where we will have to test the strength of our Hollow Knight knight . Obviously it is not at the level of the Godmaster Pantheons , but it is true that the last test can cost a bit.
This consists of three different tests in which we will have to face several streaks of consecutive enemies until we finish with all of them, at which point we will obtain juicy rewards, the truth is that it is worth spending the Colosseum.
By the way… Did you know that all the insect corpses we see in Realm’s Edge are insects that have failed in the Fool’s Coliseum? We can even see how some fall “from the sky”!
WARRIOR’S TRIAL
The Warrior Test is quite simple, it probably won’t give you too many problems.
You have to be especially careful with the Primal Aspid, that annoying enemy that throws orange balls. There are also enemies that throw their weapons like a boomerang, others with a shield that you should already know very well how to fight them, armadillos and in the final phases the Gruz will also appear, that kind of flies.
MOTHER GRUZ
As a final match we will have to defeat a couple of Gruz Mothers , but if their first match was already easy, imagine now that you are a better player and have better horsemanship… It will not be a problem.
And the best thing, after all this, the great Zote will appear to duel with us… the poor guy will do what he can, but it’s not much. Which doesn’t take away from how funny this event is, poor Zote…
REWARD
Passing the Warrior’s Test will give you the following:
- 1 Notch .
- 900 geo.
- Achievement: Warrior.
TRIAL OF THE CONQUERORS
The Conquerors Trial is considerably more complicated than the previous one. Above all, there is a quite annoying fragment where we will have to fight going from wall to wall, since there will be spikes below and therefore we will not be able to be on the ground.
In this section you will not be able to heal, so try to be cautious and stay alive while you gradually kill all the insects in the Arena, luckily it will not be an excessively long section.
Removing this, quite a few enemies will appear that we already saw in the previous tests and others will be added like those mosquitoes that dive at you and those insects that throw orange balls in all directions diagonally.
The latter is not that they pose a great challenge, but it is true that they will come together a lot and therefore things can be a bit complicated. Anyway, my advice is that you know that as long as you are not in a diagonal direction with respect to them they will not hit you with their projectiles and also you can always use the environment to block them.
OBLOBBLES
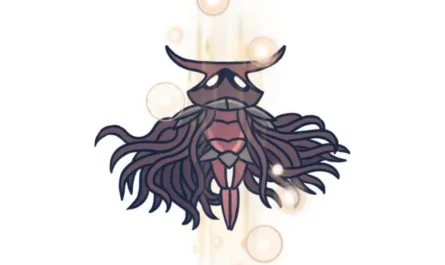
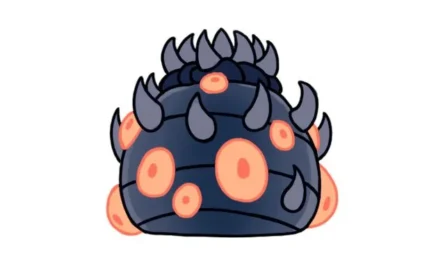
The final encounter this time will be against a pair of Oblobbles , which are sort of a much improved version of the previous enemies. They’ll basically do that, throw infection projectiles everywhere, luckily they don’t have too much health and you’ll be able to deal massive amounts of damage to them with Abyss Screech. If you already manage to hit both at the same time with the Spell… my goodness.
To heal yourself you will have to get as far away as you can and above all try to do it at the right time, the best thing is in the small pause between his projectile streaks.
And as a final piece of information, know that when you defeat one of them, the other will go half crazy and start attacking much faster. If this mode is a problem for you, a good advice is to try to lower the health of both more or less at the same time so that the second one drops quickly.
REWARD
These are the rewards for passing the Trial of Conquerors:
- 1800 Geos.
- 1 Pale Ore .
- Achievement: Conqueror.
Again very good rewards!
TRIAL OF THE FOOLS
And now we are going with what is really interesting: The Test of the Insane . It is really complicated that after all I come from Godmaster and I have spent it again to make the guide and I have reached two points of life.
This is full of enemies of all kinds, it’s crazy:
- The ones we have already seen.
- The immortal centipedes of Deep Nest.
- The traitorous Mantises.
- Those that are similar to Master of Souls and even an improved version of these that have Uumuu abilities .
- The mini-boss we meet in City of Tears just before Master of Souls. Soul Warrior.
- Those infected flies that explode when they die.
- And many more… less bees , there is everything.
If I had to highlight something from this test, it is precisely that moment in which I had two lives left and that was in another of those streaks of enemies in which we will have to go from wall to wall, only this time they have had a lot more bad blood.
What advice can I give you for this section? Pfff… Well, I don’t know… patience, practice and a lot of concentration; you will end up doing it.
SOME MORE TIPS
- Heal whenever you have a gap . After defeating a streak of enemies, when there are enemies left that don’t give you too much trouble (something that happens many times)… Your priority always has to be to stay alive, but you also have to know when the time is right. You will see how there are certain enemies with whom you can heal calmly, you can also use the environment on many occasions to heal yourself safely.
- Limits the use of Alma. I don’t recommend you cast Spells unless you have enough left over, there is nothing worse than needing heals and not having a Soul.
- Set certain priorities when defeating enemies. There are certain enemies that are more annoying than others and therefore these should be the first to fall, especially since they will be the ones that will give you more problems to heal. See Aspids and in general any enemy with ranged attacks. The ones that attack melee (except the flyers and the Mantises) are less of a problem and you can always walk away to get some Band-Aid.
- There’s a bit of a tricky segment where lots of those jumping bugs will start spawning, there will be spikes and little platforms on the ground. To be victorious, it is best to stay on a platform and constantly hit upwards so that you don’t get hit if one goes towards you. Otherwise, they will die on their own due to the spikes.
RECOMMENDED CHARMS
These Amulets can come in handy:
- Unbreakable Strength : Dealing 50% more damage makes things a lot easier. Otherwise Fragile Force.
- Dream Shield : I can’t put into words how useful this Charm is for the coliseum, it will inadvertently charge into multiple enemies and also block a few attacks that would otherwise hit you. A sacred Amulet and more in the Coliseum of the Fools.
- Mark of Pride : Greater stinger range is always a good thing, especially in that blasted section of walls. It also makes it much easier to bounce off enemies, something that comes in handy in the coliseum and in general throughout Hollow Knight.
- Grimm’s Child (phase 4) : Surely you don’t have it if you haven’t passed the Fool’s Test yet since defeating King Nightmare is much more complicated than this… but anyway, that doesn’t mean that it’s an Amulet that comes in handy for this test. You can also use phase 3 badly, the previous phases are too “meh”.
- Quick Concentration : How can an Amulet that speeds up healing not come in handy? One of the best options without a doubt.
- Quick Slash : To deal more damage due to speed on hit, paired with Unbreakable Force wreaks havoc.
GOD TAMER
And as if that weren’t already enough, after overcoming everything, a Big Boss awaits you to give you a great deal: The Tamer of Gods . It is not an extremely complicated boss and when you get the hang of it it will fall very easily, but of course… the first time you encounter it it may take you by surprise, annihilate you and you will have to start all over again… something horrible, but nothing Compared to what… I better not spoil Godmaster stuff .
But… this Boss we will see another day in a dedicated guide! When I have it I will put a link here.
REWARD
- The Glory of being a Fool.
- 2700 geo.
- Achievement: Foolish.


