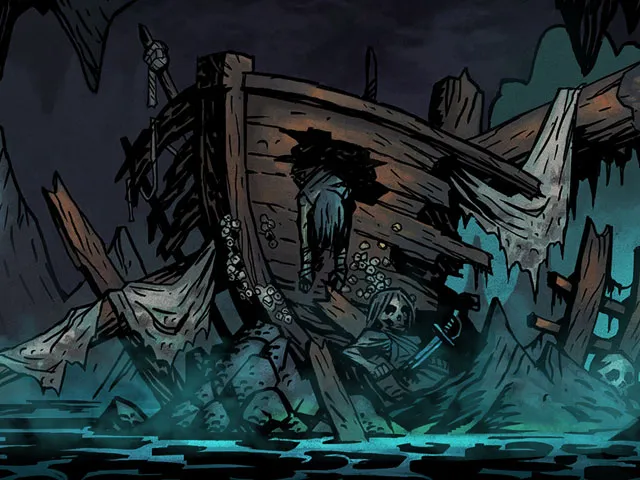
The Cove is the last area we unlock in Darkest Dungeon , so it might seem like it’s one of the worst areas in the game, but not really, personally it’s one of my favorite areas; which of course does not mean that it has its dangers like all.
It stands out for having a very high presence of Eldritch-type enemies, which is why the Occultist is a highly recommended character in this area. Enemies generally don’t apply many status ailments unlike other zones such as Foresta ; what is quite problematic is that there are usually enemies with high Protection that can protect their teammates (like what the Man-at-Arms does).
It is an area where it is highly recommended to take characters that apply Blight. Anyway, this is a summary, let’s go with the complete analysis of the area; Remember that at the bottom you will have all the interactions of the Curios in the area.
RECOMMENDED CHARACTERS FOR THE COVE

I will recommend characters very similar to the ones I already recommended for the Ruins , since characters that apply Infection also come in handy in the Cove because the enemies usually have high resistances to Bleeding and low resistances to Infection. We will also take into account that most of the enemies are Eldritch and that there are quite a few enemies with high protection (more reasons to apply Infection), to highlight that kind of squid lords that protect their allies.
- Man-at-Arms : The one I consider the best character for the first position in this area because of his very good stamina, his ability to Protect teammates and because his counterattack will also come in handy.
- Diabla : A good alternative to the Man-at-Arms. It stands out above all for its good Damage to all positions, a little less recommended in this area because we will not take advantage of its Bleeding as well.
- Leper : Another interesting alternative for its good damage to the front lines and for its ability to self-sustain Life and stress.
- Grave Raiders : One of the best options for its good flat Damage and also through Infection to all enemy positions; it is especially effective alongside a Plague Doctor. His melee attack that ignores Protection from enemies will also help a lot.
- Bandit : This character is always a good recommendation in all areas due to his good Damage to all positions, his counterattack and his good mobility.
- Bounty Hunter : Another alternative to the Grave Raider for its good Damage to all positions and for being able to Point and also Stun. I wouldn’t recommend it that much in this area, but it’s still an option to consider.
- Occultist : The Occultist is exaggeratedly good in this area due to his increased damage to Eldritchs, hisDamage and Protection debuff and of course to heal us, although you already know that his cure has some risk. Still, it’s well worth taking. The alternative for Healing would be the Vestal , but the Occultist is much more worthwhile in this area.
- Plague Doctor : In my opinion, a character that you cannot miss in the Cove for his tremendous application of Infection and for having one of the best Stuns in the game. In this area he is an incredible character. He can also cure Bleeding and Infection, which although there are not so many altered states in this area, it never hurts.
- Jester : Alternative to the Plague Doctor, especially to buff our characters and reduce their stress when necessary.
- Arbalester/Musketeer : A character that is always recommended for his good damage to enemy back lines.
Highly recommended sample equipment:
- Man-at-Arms/Devil
- Grave Raider/Highwayman
- occultist
- plague doctor
RECOMMENDED PROVISIONS
These are the provisions that I recommend the most, you know that this is indicative in the end, the expeditions have a high random component.
- Meal:
- Short: 8.
- Average: 14.
- Long: 20.
- torches:
- Short: 8
- Average: 14
- Long: 18
Then also consider taking the following:
- 3x-4x Shovels : In addition to the typical walls, we can also use it on various Curios to increase the loot.
- 2-3x Medicinal Herbs : It is one of the areas where Medicinal Herbs are most prevalent, special mention to the Creepy Coral to eliminate Negative Traits.
- 1-2x Holy Water : You always have to take it to all areas in case an Eldritch Altar appears (which with Holy Water removes Negative Traits), we can also get a good buff on one of the Curios in this area.
- 1x-2x Skeleton Key : In case a Chest appears.
EXCLUSIVE CURIOS OF THE COVE
Let’s see the entire list and my recommendations. If you want to know the Curios common to all areas (here we will see the exclusive ones of the Cala), you have them here .
BAS RELIEF
- Without using object:
- 66.7%: Random Positive Trait.
- 33.3%: Random Negative Trait.
- Using Shovel: +100 stress.
Don’t risk it because of the Positive Trait, it’s better to skip it. And of course, don’t even think about using the Shovel .
FISH CORPSE
- Without using object:
- 50%: Nothing.
- 16.7%: Gems/Trinkets x1 + Gems/Provisions x1.
- 16.7%: Red Plague Disease (-75% Bleed resistance, -10% Health and -5% Critical).
- 11.1%: Infection.
- 5.6%: Hemorrhage.
- Using Medicinal Herbs: Gems/Trinkets x2 + Gems/Supplies x2.
It’s only worth it if we use the Medicinal Herbs on it, otherwise it passes. However, always reserve at least one unit of Medicinal Herbs in case the Creepy Coral Curio appears (unless you don’t want to remove Negative Traits).
SALINE POND
- Without using object:
- 75%: Buff +33% resistance to Bleeding, Infection, Depletion and Disease until camping.
- 25%: Random disease.
- Using Antidote:
- 50%: Heal 5 Health.
- 50%: -6 stress.
A pretty meh Curio , so you could easily pass on it. The buff is good but it’s not the most interesting either, especially in this area; besides, it is not worth the risk in case you get a Disease. Using the Antidote does not give us much either since we cannot even know if a cure or a stress reduction will occur and they are quite low values. I would pass a little unless I have a character quite touched by Life and stress.
BARNACLE COVERED CHEST
- Without using object:
- 50%: Any loot x2.
- 25%: Hemorrhage.
- 25%: Nothing.
- Using Shovel: Any loot x3.
I always recommend interacting with him even without having the Shovel since the only risk is eating a Bleed (if you have your entire group very annoyed, better not play it, of course). If you use the Shovel, which in the end would be the best, keep in mind later not to run out in case the typical wall appears.
CREEPY CORAL
- Without using object:
- 50%: -10 stress.
- 25%: +25 stress.
- 25%: Nothing.
- Using Medicinal Herbs: Eliminate Negative Trait.
One of the best Curios in the area and the reason why it is always worth having Medicinal Herbs on hand (if you don’t have them, don’t interact) to be able to eliminate a Negative Trait of the character with whom we interact (if we use the Medicinal Herbs, clear).
IDOL FISH
- Without using object:
- 50%: Debuff -25% Damage and -10 Accuracy until encamped.
- 50%: Debuff -12 Dodge until encamped.
- Using Holy Water: Buff +18% Damage until encamped.
Another very interesting Curio, but only if we interact with the Holy Water. It is a very good damage buff , but remember that you will lose it when camping , so it would be ideal to first camp and then interact with it through the aforementioned item.
FIGUREHEAD
- Without using object:
- 66.7%: -25 stress.
- 33.3%: Buff +20% Damage and +4 Speed until encamped.
This Curio is also tremendous since we don’t need any object and the two things that can come out are very good. The ideal would be to interact with the character who is most affected by stress since the stress reduction will most likely skip. If you don’t have any too much stress, put the typical character that has a lot of Damage like the Bandit in case the buff kicks in .
GIANT OYSTER
- Without using object:
- 40%: Gold/Trinkets x2.
- 40%: Hemorrhage.
- 20%: Nothing.
- Using Shovel: Gold/Trinkets x3.
- Using Dog Biscuit: Buff +25 Dodge.
Interesting Curio since even without an interactable object it is quite worth it since in bad luck we will only get a Hemorrhage. In any case, it would be advisable to use the Shovel, but remember not to run out. If you go with a Canine Master it would be highly recommended to interact with the cookie , although he is not a character that I highly recommend in this area anyway; anyway, if you take him to the Cove for whatever reason, remember that here you have a tremendous interaction with the cookies, that +25 Dodge is crazy.
SWORD-HOLDER
- Without using object:
- 40%: Gold/Gems x1 + Food x1
- 40%: Hemorrhage.
- 20%: Nothing.
- Using Bandages: Gold/Gems x2 + Food x1
If you have some Bandages left over, hit him, if you don’t have Bandages I would interact with him anyway since the worst that can happen is that you get a Bleed.
LABYRINTH BOSSES
To finish I leave you a link to the guide of the two heads of the Cove:
- Siren
- Crew


