 by
by In addition to having 3 different weapons (one of the new mechanics of Blasphemous 2 ), we can also improve them to increase their power, obtain new abilities, both active and passive… well, that kind of thing. I will explain a little how this theme works.
All weapons have 3 levels of improvement. When you obtain the weapon, you already have it by default at level 1 and each new level will allow us to unlock more things for said weapon (the skills that we can acquire through Marks of Martyrdom).
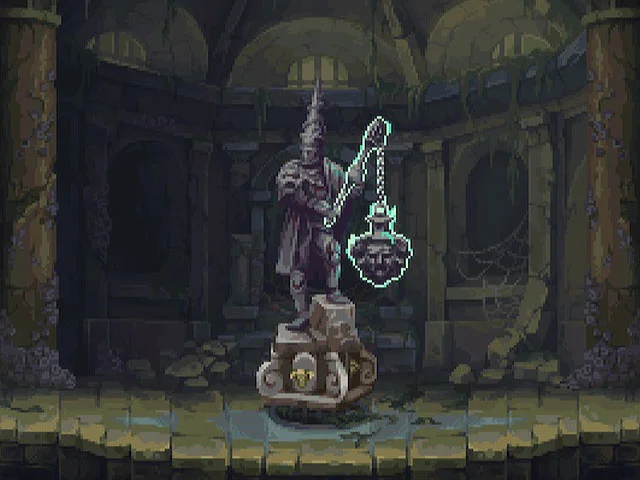
Total, that in order to increase the level of each weapon, we will have to go to certain locations to find a kind of statues of Penitent holding (like the photo at the top of the post) the weapon in question. On many occasions we will need “x” skills or “x” weapons to be able to reach these improvements, but I will explain that to you in this post.
PRAY AT DAWN IMPROVEMENTS
Let’s start with the improvements to Pray at Dawn, which I remind you is the one-handed sword:
IMPROVEMENT 1

You get the first improvement in ” Under their Floors ” (the area below Madre de Madres, where we face the Sharpener ), but to get there you need the ability “Paso de la Ceniza” (the double jump), ability which in fact is achieved after defeating the Sharpener (not exactly after defeating him, but a little after that).
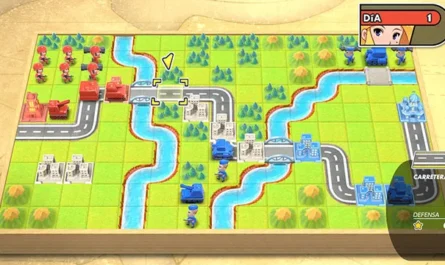
Go to the area that I indicate on the map with the red square, there is no loss. There will be a moment where you will have to use Sarmiento and Centella to hit those mirrors that teleport you and right after that do a dive attack with Pray to the Dawn to break one of those “walls of people”.
UPGRADE 2

The second upgrade is achieved in « Crown of Towers », in this case you will need the double jump and also the air dash ability (Merced del Viento). It is again where I marked with the red square, keep in mind that you have to get there by the path on the left, not the one below.
As soon as you get to the area you will have to overcome a small puzzle related to a platform (one of these that you can temporarily move by activating a kind of statue) and one of those walls made of people that you can destroy with the Pray to Dawn dive attack .
You will have to hurry a lot, but the idea is that you quickly go up to the platform on the left with the double jump, then jump + dash to go to the platform on the right, jump + dash again to go to the next platform of the right and after this jump + dash + dive attack of «Pray to the Dawn». The same written sounds a bit far-fetched, but in practice it’s easy .
SARMIENTO AND CENTELLA IMPROVEMENTS
Let’s now continue with the improvements of the double swords:
IMPROVEMENT 1

The first improvement of Sarmiento and Centella is very easy to achieve, but you will need to have the double jump ability, if you do not have them, it is better that you leave it for later. The area you see above in the photo is called « Coro de las Zarzas «.
If you look at the map above, I have marked the location with a red square. Actually you will see that there are two red squares, but anyway, you have to go to the red square that does not have a blue background and there activate the typical statue. After this, a door will open a little further up, you will have to go quickly to reach it before it closes (this time trial is not very difficult, really).
As soon as you cross this door it is easy:
- You pull to the right.
- You hit the mirror with Sarmiento and Centella to teleport.
- Jump up in the air and hit the next mirror.
With that you already have it.
UPGRADE 2

The second improvement of this weapon is one of the most difficult to achieve, but not because it is complicated as such, but because it is the one that requires having advanced the most in history of all.
In this case we will need the Skill ” Protection of the Kindred “, which is what allows us to activate that kind of yellow sparkle that we see in various areas; these sparkles will become Cherubs that will allow us to reach new areas (they are like rings that you can hold on to). You will find this Skill in «La Torre Cerneada», very close to the boss «Synod, Hymn of a Thousand Voices».
As you can see in the photo above, you have it in the upper right part of “Templos Azulados” and you have a checkpoint very close. To get there you will have to use different skills, but if you have already reached this point in the story they will not give you any problem. By the way, notice that there is a green dot marked a bit to the right of the red square (buff is in the red square), there you will find a “Silver Plated Crystal Shard” (increasing the healing efficiency of the Biliary Flasks), so take advantage of it if you don’t have it yet.
VERDICT IMPROVEMENTS
Finally, all Verdict upgrades (the two-handed weapon):
IMPROVEMENT 1

The first upgrade of Verdict is easy to obtain, but you must have previously defeated the 3 Remorse since we will find it in the ” Temples Rising ” area (this area is unlocked by defeating all 3).
As you can see in the photo above, you have a sanctuary very close (the checkpoint ). On the way you will have to hit one of those Verdict bells to pass over those platforms that are activated by the shock wave that is created when the bell is hit; this in order to activate a chain that will open the door that leads right to the improvement.
UPGRADE 2

And we are going with the last improvement of all. This is also very easy to find and if you haven’t found them yet it’s probably because you just haven’t reached the ” Sunken Cathedral ” yet, which is the area where we’ll find it.
If you haven’t unlocked this area yet, it’s because you haven’t advanced far enough in the game’s main story. To unlock it you have to defeat Benedicta, of the Perpetual Prayer . Once you get to the area, there is no loss, it is to go to the location that marked you in the photo with the red box.