 by
by Well well, today I bring you the guide to the Dweller of Affliction from Sea of Stars , the first Dweller that we will face (which I was already looking forward to) and the truth is that it is a tremendous battle and I loved it. He is an enemy that gives a pretty bad vibe already in his first phase, but in the last one, I tell you, even more so.
It is not a difficult encounter because luckily for us we have the help of Brugaves and Erlina (the other 2 Solstice warriors older than us) and above all because of the incredible contribution of Director Moraine, the truth is that this man is very broken ; Without it, at this point in the adventure, we would be completely lost.
Also, I can tell you that from here on the plot of the game is going to get quite tricky because well, I’m not going to give away spoilers , but interesting things are going to happen, at least when you manage to defeat this boss.
HOW TO DEFEAT THE MORDOR OF AFFLICTION
The battle is divided into 3 clearly differentiated phases:
PHASE 1: MOIRAINE STARTUP AND SKILLS
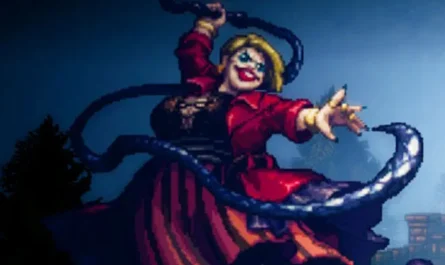
We will face the first form that the Dweller of Woe will have, which is a less powerful form (I suppose he considers that it is not necessary for him to acquire his true form).
We will have the help of Brugaves and Erlina (who will attack their ball) and Director Moiraine (we can control this one, he will replace Garl), who only has two attacks (more than attacks, they are two different modes that we can activate, but we cannot have both at the same time):
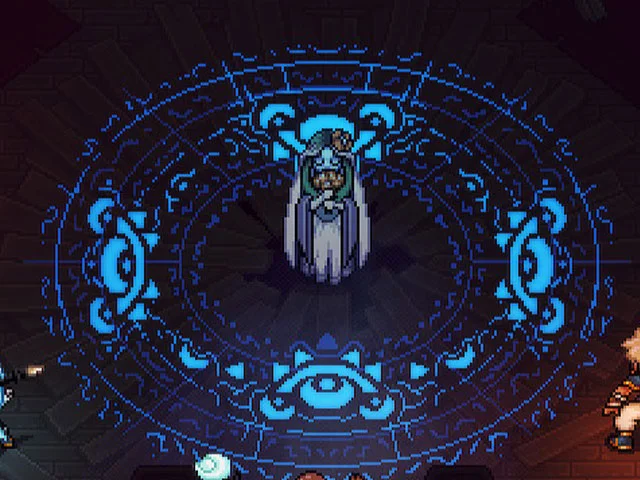
- Maintain Rune : This is what you have to do every turn with him, basically he will keep the rune that is on the ground around the boss conjured at the beginning. This rune couldn’t be more OP since when it is active it will multiply our Sun and Moon damage, I think something like x5 damage, which is stupid.
- Heal : It will heal the entire group, while it is in this mode, it will heal the entire team. It’s great if we’re in a pinch, but it’s best not to use Moiraine to heal because her “Keep Rune” is too broken and we want to always have it active. The other Solstice warriors will heal from time to time, but if you are in a hurry it is better to use items or Zale’s Healing Light.
During this phase, these are the attacks of the Dweller of Woe:
- Claw Attack : It will randomly hit two characters (from all those on the field) with its claws simultaneously, try to block it as usual.
- Reflected Images (3 locks) : The Dweller will create an image of himself that we will have to eliminate as quickly as possible. His thing is to launch attacks in the area to cause damage to the boss and at the same time to his image, thanks to the Rune, he will fall quickly. Remember to try to remove as many locks as you can. The image itself will attack us with “Claw Attack”, it is like a “boss duplication”.
- Soul Spikes (6 locks) : Will raise his hands and damage all characters simultaneously. He’s quite difficult to block, but you have to be quick as soon as he raises his hands and does the shout. It is very important to remove all the locks we can to reduce the damage.
It won’t be long until the next phase begins.
PHASE 2: GARL TO ACTION!
Now we will have an intermediate phase in which we will take control of Garl, who will have to get more light into the battle area to further enhance Moiraine’s rune. What we have to do is very simple:
- We go down a little and go up the stairs that we will see on the right.
- We interact with the “little glow” that we will find in that area.
- We interact with the next “brightness”, it is below.
- Another one we have on the left.
- To finish we interact with the last one of all, which is in the area that we just cleared.
After this we will get more light into the area and the best thing is that we will get a new attack for Garl (in this battle we won’t be able to use it to test it, a shame about that) called ” Surprise Pot “.
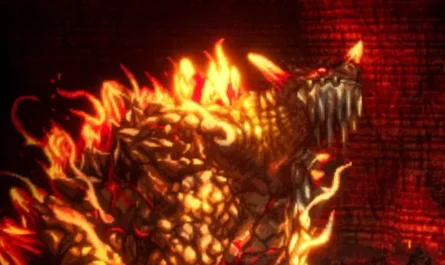
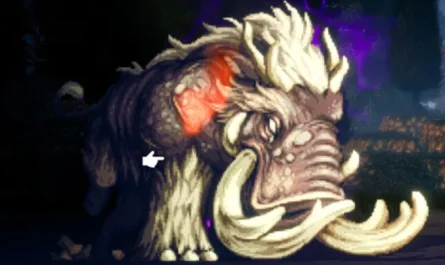
PHASE 3: THE TRUE FORM OF THE DWELLER

No wonder it hides its true form, what an ugly thing.
This is already the last phase, here the Dweller will cause more damage. You will have to be more careful than before , but it is still quite bearable thanks to the help we have. These will be his attacks now:
- Possession : He will take control of one of the characters (it seems that luckily he cannot control Moiraine) and force him to attack one of the characters on the field.
- Spectral Scythes (3 locks) : He will launch Scythes towards each of the characters simultaneously, it is easy to block because they are somewhat slow. Be very careful because depending on the locks that the attack has when it is going to be carried out, it will bounce more (that is, after a hit, it will continue hitting) and if you set it up so that there are many locks the damage will be terrible.
- Pain (10 locks) : An attack that will damage all the characters on the battlefield, doing a lot of damage. I haven’t managed to block it once, I don’t even know if it’s possible because it does it very suddenly, but… that means that the most important thing here is to try to eliminate as many locks as we can to reduce its damage.
It is very key to use Restorative Light to heal yourself when necessary, Solstice Strike does not spread too much because it is physical damage. When you don’t have MP to launch a magical attack, your best bet is to pull an elemental orb to be able to deal magical damage with basic attacks (remember that our Solar and Lunar damage is greatly enhanced by the Moiraine Rune).
If at some point your two Solstice warriors are defeated, I do recommend that you use Moiraine’s healing so that you can keep him alive while Zale and Valere are resurrected.
REWARDS
We won’t get anything beyond Garl’s Skill that we’ve already mentioned, well, a pretty crazy plot twist, that is.