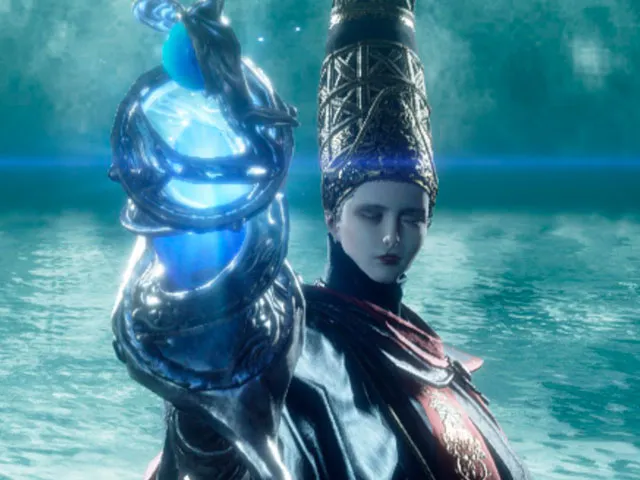
Rennala, the Queen of the Full Moon is the second great boss of the Elden Ring (not counting Margit , who despite having everything a main boss has to have, in the end, is not one of those who give us a Great Rune) and it must be said that I personally found it very easy, but I understand that depending on the build you have, this boss can be horrible (especially if you are a mage).
His first phase is a joke, which we will give more details later in the guide, but in the second you do have to be very careful because he deletes with his powerful magical attacks and it is exaggeratedly easy for him to kill us; however, he is also a boss who suffers quite a bit from physical attacks and therefore characters going to Strength or Dexterity shouldn’t have too much trouble.
Anyway, let’s not rush things; Let’s see first as always his location and after this the guide to defeat him.
LOCATION: GREAT LIBRARY OF RAYA LUCARIA

The photo is indicative, do not take into account the marks because it is a photo from another post, now I will explain how to get to it anyway. We will find it in the Academy (in Liurnia) and the closest grace is in fact the one that we unlock by defeating the Red Wolf Radagon , so if you have not done this boss, I recommend that you visit his guide before because it is the previous boss that there is before Rennala and from there it is very easy to explain to you.
The case, from the grace of the battle against the wolf, we will simply have to move on. We will find ourselves in an area where we will see a large ramp/bridge that we can access through some small paths attached to the bridge. Be careful because some huge rocks will fall and roll all over the ramp, if they hit you you will heal and move forward; You will see that in its trajectory there is a safe zone (in a slight curve).
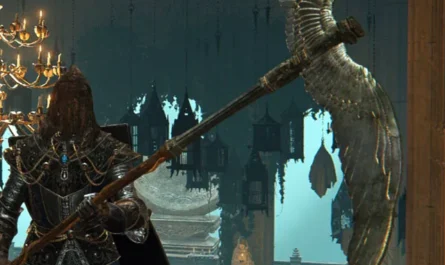
When we reach the top of the ramp we will have to fight against a quite powerful Carian knight who, upon defeating him, will release the Carian Shield (a very good shield to block magical damage). A little further on from this meeting is when we will arrive at Rennala.
RENNALA ATTACKS AND STRATEGY
This fight is divided into two phases:
PHASE 1: SHIELD AND THE CHILDREN
The whole area will be full of mages that crawl on the ground (they are bad vibes, really) that although they are a bit heavy, they do not pose a great threat either. Rennala will be protected by a shield and from time to time she will use her magic to make some objects levitate and explode us or even make the lamps in the area fall on our head (be careful with that).
The thing is that one of the crawling wizards, randomly, you will see that it will have a golden circle around it (you can pass the others). You will have to kill that particular mage; when you do, another random mage will get this golden circle and you will have to repeat the process 3 times; that’s when he loses his shield.
When she loses her shield you have to lynch her and lower her life as much as you can, she will be completely defenseless and the truth is that it is easy to lower her life; his thing would be that you take away at least 50% to finish off the next one. Be careful because after a while she will start to shine and you will have to get away from her since she will make an area attack and the shield will be applied again.
After this you have to repeat the process again, only now from time to time Rennala will throw some tombstones at us that do a lot of damage; She takes advantage of the environment to be under cover whenever you can between killing the magicians with the golden circle.
PHASE 2: RENNALA BUT SERIOUSLY
Phase 2 is where things really get complicated since we will be in a face-to-face (without those heavy crawling wizards) against Rennala and this is where she will show us her range of spells , which are all quite op, really.
The logic here is simple; Ranged Rennala is a monster that won’t stop spamming powerful spells, but melee is a hot sell. The idea is that you get as close as you can to her (with your head, if she hits you with something you will notice it a lot) and lynch her body to body (hit her as much as you can), you will see that her life will drop quickly. The key is that, be super aggressive with her and try to shorten distances since when you are close to her she loses a lot of damaging potential, but yes, she is not stupid and will try to get away from you.
Regarding his attacks, we will mention the most relevant:
- Magic Cannon : A Kamehameha so that we understand each other. It is one of the best times to approach her and hit her (while dodging the hit, of course).
- Chasing balls: The typical spell of balls that chase us, he casts it very often and it’s a real pain because it will make it quite difficult for us to get close when they are present since at that moment the priority is to dodge them and it is easy for you to eat some even while keeping an eye on them. them (and they do a lot of damage).
- Luna : A sizable ball of energy that will slowly move towards us and explode when it hits the ground creating an area. Easy to dodge, but again it will make it difficult for us to get close, it is better to wait for it to explode because as soon as it hits you, you will see the stars.
- Summoning : Also, sometimes he will summon an NPC to help him, so the best thing you can do is ignore him.
That said, the best strategy is to delete it quickly, if things take longer than necessary, it will surely kill you at any time.
REWARDS
By defeating him we will obtain the following:
- Memory of the Queen of the Full Moon : Rennala’s Memory with which we can obtain the Regio Cariano Scepter and Rennala’s Full Moon Spell.
- Great Rune of the Unborn : Object that unlocks the ability to reset our character’s statistics to relocate them if we want. We will have to talk to Rennala (she will stay in the same area when defeating him) for this.


