 by
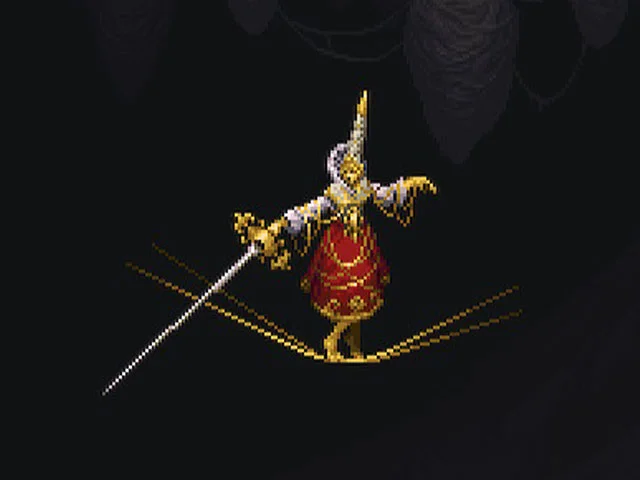
by Orospina, Major Embroiderer is another of the three Remorse that we have to defeat at the start of Blasphemous 2 in order to be able to continue progressing in the story, in this case so that the city that is held in the air by some kind of huge beings that They look like statues descending.
I really liked the boss a lot because he’s the typical boss who forces you to get your act together in the face of a mechanic that I’ve always found very interesting: the parry (I think there are few things as pleasant in a video game as nailing a good parry ). In case someone doesn’t know what I’m talking about, the parry consists of blocking an attack at the exact moment it is going to hit you and then giving a powerful counterattack; It’s a very common mechanic in Souls-like games or many others.
And by the way, this boss has reminded me of Hornet from Hollow Knight in several ways: She is a girl who carries a rapier (Hornet a needle, but more or less), uses spider webs (Hornet’s mother is a spider and she wears silk), some moves are similar, and on top of that he says “Git Guuuud” in the middle of battle (okay, that last one is a lie, but it would have been cool). I don’t think it’s a coincidence, it must be a reference.
But hey, you’re here to see Orospina’s guide, not to read my ravings… so nothing, let’s go!
BOSS LOCATION: SETILLOS PALACE

We will find the Orospina, Major Embroiderer in the « Palacio de los Setillos », which is the colored area… navy blue with perhaps a touch of purple? Well, anyway, you can see the color in the photo, although depending on the screen/device that may vary slightly, besides that when editing the photo the color also changes a bit. Well, I’m getting involved again, I continue. You will reach this area if from the “City of the Holy Name” you pull to the right; You will arrive at an area that on the map is painted as yellow or light brown, so you continue to the right and eventually you will end up arriving at the “Palacio de los Setillos”.
I have marked the exact location with the skull mark and with the pink arrow. If you notice, I have also marked the photo with a couple of pink dots. Your objective will be to go to the area that is between the 2 pink points, first you will have to go on one side and then you will have to go on the other; in both cases you will have to cut the golden threads that maintain that huge golden cocoon (cocoon of the worm, what surrounds the chrysalis, you know).
The case, when you do, the cocoon will fall and that’s when you can access the area where the boss is.
HOW TO DEFEAT OROSPINE, GREATER EMBROIDERERAD
To defeat him, it will be essential to have the double sword weapon: Sarmiento and Centella , a weapon that very coincidentally (ironically) is unlocked in the same area as the boss and is also necessary to reach him. If you still do not have them, look at the photo above, it is where I have marked the map with a red square, on the right side.
It is essential that you have the «Piercing Retribution» improvement (the one that allows you to make the perfect parry ) and also highly recommended that you have «True Dexterity I» (so your weapon will be imbued with electricity under certain conditions, you will cause more damage and you will also be cool much more, all advantages). These enhancements are achieved through the Marks of Martyrdom.
The boss has 2 phases:
PHASE 1
These are the attacks of Orospina, Major Embroiderer at the beginning of the battle:
- Basic Lunge : Basic forward lunge strike with a good horizontal reach. The key is to parry him ( ideally perfect, but if you miss hit him a bit after the parry ). It’s easy to see when he does it if you look closely. If you hit her with the perfect parry , she’ll hang around for a while, so you can hit her with a few passing shots.
- Throwing Projectiles : The boss will do a kind of somersault, jump backwards and remain suspended in the air for a moment, after which he will throw several projectiles at us at once. The easiest way to dodge them is to dash ; don’t go behind him to hit him when he makes this attack, better stay on the ground waiting for him to launch the projectiles, dash and follow yours.
- Vertical Throw : A vertical strike with your rapier. You can parry it ( would be ideal), but you can also dodge it. He usually does it right after taking a small jump back, as soon as you wait a bit and parry him ( with a little practice you’ll get the timing ). Be careful because sometimes he jumps back but does not attack, well, you parry anyway , if it turns out that he did intend to attack later, then you will eat the blow. Oh, and if he’s on the edge of the screen he won’t jump (he’d kill himself and such), so be careful because in that situation he can launch this attack completely unexpectedly (without jumping back to let us know).
- Mega Charge Thrust : You will see how it stays for a while as if charging an attack and after this it will make a thrust in which it moves so fast that it is practically a teleport , it will hit from its position to the end of the screen. I don’t think you can parry it , I’ve tried it several times and nothing, so you better jump to avoid the blow and that’s it.
- Surprise Attack : Orospina will disappear from the screen and after a short time you will see that some “glitters” appear in an area and a little later she will appear making several attacks. Here I recommend that you simply walk away and when she finishes all her blows you start to hit her (but be careful, she will quickly attack you again with one of her attacks).
- Surprise Attack + : It will start doing it when you have already lowered its life enough. It will disappear from the screen and do the same thing that some “glitteries” appear and after this it will attack, only now there will be many “glitteries” at the same time. The idea is to find the gap between them to avoid damage, if you see that you are going to inevitably eat one, roll parry to block it.
PHASE 2

When you lower his life more or less to 25%, he will enter phase 2. Ok, don’t panic, because at first it seems that you are going to eat the typical phase of 2 simultaneous bosses and not (that will come, I suppose more forward). Simply, at the beginning it will summon two “Golden Orospinas” that will launch the “Projectile Launch” attack at you simultaneously and then you will fight the boss alone again. Now I will explain how to dodge this attack (exaggeratedly easy to dodge) and the changes in other attacks that it has, which in the end are the ones that you have already seen with one that improves a little and a little more (and that the boss has more bad temper , but that’s common):
- Projectile Launch + : The attack I was commenting on is like “Projectile Launch”, but projectiles will come from both sides and it will be in several streaks. As I have already told you, it is very easy to dodge this, I will explain. You stand still in the center of the screen, you stand there, trust me. Sometimes the blows won’t even hit you, when if you see that one is going to hit you, you stay still and parry before it hits you. You do this all the time until it’s done and voila, you can literally dodge it using just one finger.
- Surprise Attack ++ : It’s like Surprise Attack +, but there will be more “glitter” with its consequent more hits. Here it is even more important to find the gap well and be careful to make a parry (a block would be better, but I think the point is understood) if you do not have time.
- Mega Charge Thrust + : The same, but now it will do the attack twice, so be careful because now you shouldn’t attack him when he makes the first attack, you wait, you give another little jump and after that you can resume the offensive again.
In this phase he moves a lot more in general to make it harder to hit him.
STRATEGY AND TIPS
Not much to say because if you take into account everything that we have commented above about his attacks, well you already have it, it is to dodge / parry his attacks as we have already commented and between attacks if you can take advantage to hit him and go down life. If you nail the perfect parrys well , the boss won’t last too long . Phase 2 gets a bit complicated, but luckily there he will have little life left and he will fall quickly (it costs more to hit him, but if you hit him a bit and hit him with a parry, you already have it ) .ad
In order to heal, the best moment in my opinion is just when the attack «Mega Charge Thrust» ends, after dodging it with the jump, you take the opportunity to drink the Bile Flask. Remember that in phase 2 this attack will do it twice in a row, so heal yourself when you dodge the second with the jump.
REWARDS
This is what we will get by defeating him:
- Tears of Amends : 2,000.
- 1 Mark of Martyrdom : They serve to increase the capacity of the Table of Favors and to improve the Penitent’s weapons.