 by
by The Ruins is the first area that we will have available in Darkest Dungeon and it is certainly the simplest of all in general terms, although of course you already know that this game stands out for being quite complicated, so don’t trust it either.
It stands out mainly for being an area full of enemies categorized as Impious (which would be skeletons) and for normally having monsters that apply a lot of stress to our characters in the back lines. It’s best, generally speaking, to finish off the enemies behind you first.
It should also be noted that it is an area where we will rarely find food through Curios (interactable stage objects), so it will be better to go well stocked with food rations.
Anyway, this in the end is a mega-summary, let’s go with the complete guide!
RECOMMENDED CHARACTERS FOR RUINS

These are the most recommended characters for the Ruins. As a general guideline, we recommend not taking characters that stand out for their application of Bleeding and of course it will also be a very good idea to take characters that have positive damage modifiers towards the Impious (skeletons, come on).
- Crusader : The best option for position 1 as he has abilities that will deal higher Damage to Wicked, which is why he is the best tank character for Ruins. Man-at-Arms or Leper would be alternatives.
- Bandolero : One of the most versatile characters and with good Damage to all positions, a Bandolero never hurts. His counterattack is very effective and if he is not moved he is too easy to adapt.
- Grave Raiders : For its good normal damage and infections to all enemy positions.
- Bounty Hunter : While there aren’t many humans in the area, it’s still a class with very good damage and support options and also a lot of versatility.
- Plague Doctor : One of the best options for both damage and support. Their Stuns and Infections will come in handy, we will also be able to cure the Bleeding/Infection (especially the Bleeding in this case) that apply to our characters.
- Arbalester/Musketeer : Since it is very important to deal with enemies from the rear positions, this character (specialized in ranged damage) is phenomenal.
- Vestal / Occultist : You will need a Healer. The Vestal heals more safely and can heal the entire party simultaneously; the Occultist is more risky towards his heals but provides more damage and support.
Highly recommended sample equipment:
- Crossed.
- Bandit.
- Vestal.
- Plague Doctor.
RECOMMENDED PROVISIONS
These are the provisions that I recommend the most, you know that this is indicative in the end, the expeditions have a high random component.
- Food:
- Short: 8.
- Medium: 16.
- Long: 24.
- torches:
- Short: 8
- Medium: 12
- Long: 16
Then also consider taking the following:
- 2x Shovels : In case we find walls on the way. If it is medium or long you could even take 3 just in case.
- 2-3x Holy Water : It can be used in various curios in the area and some are very interesting.
- 2x Skeleton Key : It is common to find locked chests.
CURIOS EXCLUSIVE TO THE RUINS
Let’s see the entire list and my recommendations:
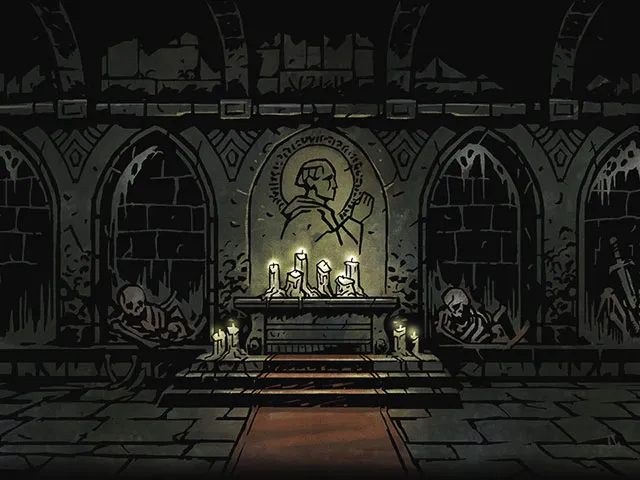
ALTAR OF LIGHT
- Without using object:
- Buff +20% Damage until encamped.
- Using Holy Water: Buff +30% until camping.
Always interact with him and with the character that deals higher Damage (such as the Crusader or the Bandit). If you’re good at Holy Water (it’s better not to run out because you could find other curios that eliminate negative traits) you can use it here, but your thing would be to take the opportunity to camp and then interact with it to maintain the buff .
CONFESSIONAL
- Without using object:
- 50%: +15 stress.
- 25%: Gold/Trinket x6
- 25%: Remove Negative Trait.
- Using Holy Water: -30 stress.
Even with the odds against us, it is better to play it and interact without an object, especially in case we are lucky and we can remove a Negative Trait from a character (interact with the one that interests you the most). But of course, don’t interact with a character who is under a lot of stress.
If you have a very stressed character, then it would be worth investing a Holy Water to alleviate a good amount.
IRON MAIDEN
- Without using object:
- 40%: Random loot x2.
- 20%: Negative Trait “Claustrophobia” (+20% stress in corridors).
- 20%: Nothing.
- 13.3%: Tetanus disease (-5 Accuracy and -5% Critical).
- 6.7%: Random disease.
- Using Medicinal Herbs: Random loot x2.
As you can see, it’s not worth interacting with him unless you use Medicinal Herbs since there are many risks such as annoying traits and diseases (and even if they weren’t, it’s not worth it).
SACRED SPRING
- Without using object:
- 50%: -10 stress.
- 50%: Gold and Relics x2.
- Using Holy Water:
- -20 stress, eliminates losses, +15 health.
A good option in which to spend a Holy Water to relieve stress and incidentally eliminate depletion and heal a character a bit of health. In any case, unless a character needs it a lot, it is better to interact without an object since it will always give us something positive.
LIBRARY
- Without using object:
- 20%: Reveal the map of nearby areas.
- 20%: +15 stress.
- 20%: Journal entry.
- 13.3%: Positive Trait.
- 6.7%: Negative Trait.
- 20%: Nothing.
Skip them, they’re not worth it.
ALCHEMY TABLE
- Without using object:
- 50%: Infection.
- 25%: Gold and Relics x1.
- 25%: Nothing.
- Using Torch:
- It will fill the Light meter up to 100.
- Using Medicinal Herbs:
- Gold and Relics x2.
If you have Medicinal Herbs, this is a good place to use them. On the contrary, it is better to skip interacting with him.
ARMORED SUIT
- Without using object:
- 75%: Buff +15% Protection and 10 Evasion until camping.
- 12.5%: Ruins Adventurer Positive Trait (-20% Ruins stress).
- 12.5%: “Ruins Tactician” Positive Trait (+15% Ruins Damage).
One of the best items to interact with as it brings some really cool stuff without the need to use any supplies. I recommend that you interact with the character that is in first position since it will be the one that will get the most out of the buff .
SARCOPHAGUS
- Without using object:
- 60%: Gold/Relics x2.
- 20%: Negative Trait “Thanatophobia” (+20% stress if life <50%).
- 20%: Nothing.
As you can see, you can’t interact with it through any object and since we don’t want to risk eating a Thanatophobia, it’s better to ignore this Curio directly.
CLOSED SARCOPHAGUS
- Without using object:
- 50%: Hemorrhage.
- 50%: Infection.
- Using Skeleton Key:
- Gold/Relics x2 + Gold/Trinkets x1.
- Using Shovel:
- Gold/Relics x1 + Gold/Trinkets x1.
If you have any Skeleton Key or Shovel left over, it’s a good idea to interact with it; otherwise it passes from him. Keep in mind that the Key lasts a little longer if you have both.
Make sure that the name says “Closed” otherwise it will be the one that is best never to interact with. Differentiating them visually is quite easy since the Sarcophagus that we are NOT interested in has a kind of corpse lying on top . The good one (this one) has nothing on it, but as I have already mentioned, you should only interact with it if you have a Key or a Shovel.
DECORATIVE URN
- Without using object:
- 44.4%: Relics/Trinkets x1 + Relics x2.
- 22.2%: Infection.
- 7.4%: Disease «Whooping Cough» (-20% Damage).
- 3.7%: Random Disease.
- 22%: Nothing.
- Using Holy Water:
- Relics/Trinkets x2 + Relics x2.
- Using Shovel:
- Negative Trait «Guilt Complex» (one of those traits that will make the hero interact on his own with some curios).
If you have Holy Water, give it (although I insist that it is better to keep at least one for what may come), otherwise spend a little.
SEALED SHOWCASE
- Without using object:
- 50%: Hemorrhage.
- 50%: Infection.
- Using Skeleton Key:
- Gold/Relics x3 + Gold/Gems x2.
- Using Shovel:
- Gold/Relics x2 + Gold/Gems x2.
It’s pretty much the same as we have in the “Locked Sarcophagus” with a little change to the rewards when using Shovel or Key. The same, if you do not have one of these two objects, it is better not to touch it.
BOSSES OF THE RUINS
To finish I leave you a link to the guide of the two bosses of the Ruins:
- Necromancer
- Prophet