 by
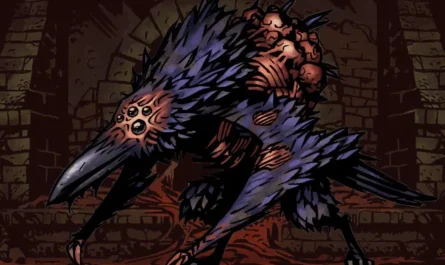
by We continue with the bosses of Blasphemous 2 and this time I bring you one of the three Remorse that we have to defeat at the beginning of the game in order to progress in the story. The first one I’ve defeated is the one you see in the photo above, the Grand Preceptor Radames (the boss’s design is really cool).
The difficulty has increased quite a bit compared to the first boss of the game (the tutorial boss if you will), this is starting to feel more Blasphemous now, but I’m sure there are still much more difficult bosses ahead of us. He is not a complicated boss as such, at least in my opinion, but it is true that if you don’t learn his skill kit and so on, it is easy for him to make you eat the ground sometimes.
So nothing, let’s go with your guide!
BOSS LOCATION: HOLY GRAVES

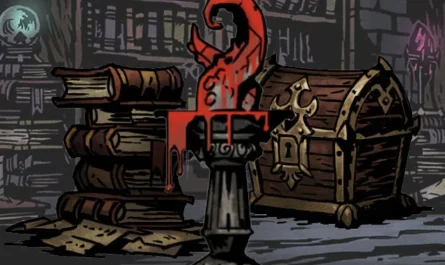
We will find the Great Preceptor in the « Sacred Sultos », which is the brown area that you see in the image above; To get there you will have to go up the road from Albero 2.0 (City of the Holy Name) and cross the blue area called “Aqueducto de los Costales”.
The exact location of the boss is where I mark you with the arrow (I have put the skull mark on it from the game map itself as well). To get there you will have to get past the brown area by activating a series of mechanisms that will add or remove sand from the site to unlock new areas. As you can see on the map I’ve added above, you have a… Sanctuary? very close (the checkpoint let’s go, the name doesn’t come to me now).
HOW TO DEFEAT GRAND PRECEPTOR RADAMES
Next we go with the guide to defeat him. We will start by looking at his attacks and several tips on how to dodge them, the best moments to attack… etc. and after that I will continue with the ideal strategy to defeat him. We will divide this battle into 2 clearly differentiated phases.
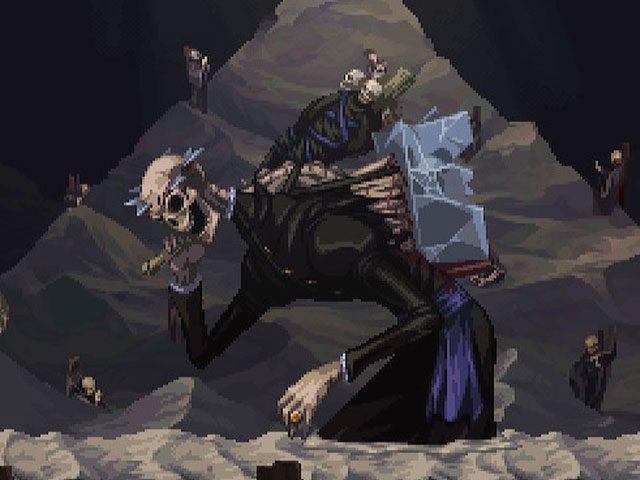
PHASE 1: THE BEGINNING
These are the attacks of the Radames Grand Preceptor at the beginning of the battle:
- Vertical Sledgehammer Hit : He will strike forward with his mallet with the great drawback that this attack has a fairly long range and also performs the attack quite quickly. His thing is that you make a dash backwards or that you move backwards
- Horizontal Sledgehammer Hit : Attack very similar to the previous one, you can do the same as I have told you to dodge it. It is somewhat easier to dodge this one, yes.
- Low Deck Hit : Another similar to the previous ones, but this one does it very rarely for some reason. It is a hit with relatively little range but aimed downwards. The case, the blows of the mallet, the best thing in all cases to avoid getting involved is that you always back down and that’s it.
- Throwing Violet Balls : It will launch a pair of violet projectiles in the direction of the Griever. Sometimes they will go up (you duck to dodge) and sometimes they will go down (you jump to avoid being hit), you can predict where they will go based on the position you see the attack being drawn in before it is thrown. When you have lowered his health enough, be careful because he will start shooting 3 balls instead of 2.
- Charge of Crystals : The attack that interests us the most because this is where we will have a gap in his perfect defense to hit him beautifully. You will see how the boss nails himself like crystals and charges towards you. In the process, one of the side walls will be eaten and the boss will be stunned for a while, so we can take advantage of it to hit it with everything. The idea is that you use the area of the wall that you can “hook” on through the “Ivy of Ascension” ability (the ability to hook on walls to be able to do the typical bounce jump on a wall) to dodge easily this burden.
- Explosive Air Balls : A rather rare attack that I have rarely seen him do, it will summon a kind of air-like balls in a position that after a while will explode in a not too large area. Stay away from them.
PHASE 2: STANDING
When you lower his life below 50% (actually you have to lower it a little more than 50%) you will see how he suddenly grabs the… sir? that he has on his back and literally eats it. This will heal the boss back to 50% of his total health again.
On top of this the boss will stand up and get new attacks (and some rocks will fall from the sky, but only for a very short time, don’t worry anyway, they will fall again with one of the attacks you I’ll mention you below); I think it goes without saying that in this phase the battle gets a little more complicated. Be careful because in this phase it seems that his defense attribute increases or something because he will receive less damage.
- Deck Hits : He has some deck hits again, it’s the same story as in phase 1.
- Corresuelos Crystals : It will summon some kind of crystals that will travel the floor in your direction up to the wall, one after the other with some pause between them. The idea is that you jump to avoid them and little else. In this phase is the best time to hit him since between jumping to avoid the “waves of crystals”, if you ride it well to be close to him, you can hit him in the air between jumps to do damage between you dodge
- Downward Confetti Throw : It doesn’t throw confetti, okay, but I like to call it that. It will throw things down, it is a fairly fast attack, but it has very little range and since the idea is that you are “never” (you will have to attack it at some point of course) too close to the boss, you should not eat it.
- Throwing Violet Balls + : It will continue to do this attack, from now on it will always be 3 projectiles.
- Charge of Crystals + : Similar to the Charge of Crystals that we have seen in the first phase, only now it will cost a little more to dodge it because being taller due to standing makes things more complicated, but the procedure remains the same, only that you will have to speed up the “wall bounce jump” much more. Of course, be careful because now it is not such a good idea to start hitting him a lot after this (in fact hit him at most and you’ll be gone), in the first place because those happy rocks from the sky will begin to fall on you and they will fall right on your current position and secondly because if you stay close to him when he recovers from the stun he will give you a huge surprise hit with quite a bit of bad temper.
STRATEGY AND TIPS
The idea is to use the typical strategy of avoiding an attack, quickly approach to give it a touch or two, move away, dodge the next attack… and so on . In phase 1 it is to do that and also be very attentive when he is going to do the “Charge of Crystals” (he will do it normally when he has something cornered against the wall) to avoid him and after this attack him as I have mentioned in the attack guide above.
In phase 2 we repeat the same strategy, just remember that in this phase we will not be able to hit him too much when he does «Charge of Crystals +», here the best moment to hit taking advantage of one of his attacks is when he performs «Cristals Corresuelos», the Hitting him in the air while we dodge the attacks from the ground with jumps.
If you are using Verdict (the two-handed weapon, it is the one I chose) I recommend that you spam the jump attack a lot to be able to hit him from a safe distance (and you control the movement in the air to get more or less closer) without losing as long as it occurs when using the running attack; This is luxury in this boss.
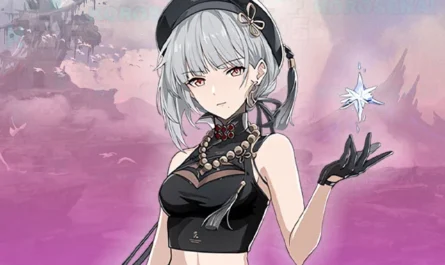
Oh, and if you have unlocked the help of «Yerma» (the girl that wears a green cape) you can accept that she helps you in this battle, but I tell you that it does not do much.
REWARDS
This is what we will get by defeating him:
- Tears of Amends : The currency of the game, you know.
- 1 Mark of Martyrdom : They serve to increase the capacity of the Table of Favors and to improve the Penitent’s weapons.
By the way, as you end up with this boss, continue to the right until you go down some stairs and hit the wall below the stairs (one wall to the left). There you will find one of those Sisters.