 by
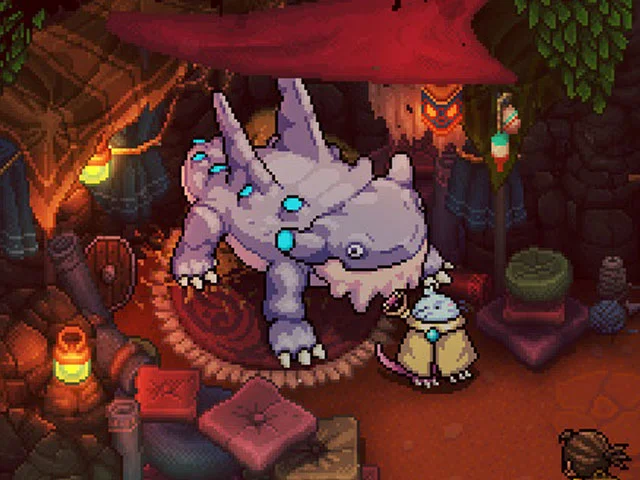
by Malkomund and Rockie are the fourth boss of Sea of Stars , well, actually we already faced Rockie alone before but the truth is that I preferred to directly create only the combat guide between these two because the battle alone against Rockie is not possible. He feels very much like a boss but more like a stronger than normal and total enemy, now we find him again in this battle very shortly after.
The boss is not too complicated, in fact it was more difficult for me to defeat the previous one (the Ancestor of the Mist ), but in any case we will see his guide as always, which as usual, I want to have the guide of all the bosses on this page.
HOW TO DEFEAT MALKOMUD AND ROCKIE IN SEA OF STARS
On this occasion we will separate the guide into 2 clearly differentiated phases of this combat and we will see, as always, the attacks that both enemies will make and the way to block them to slightly reduce the damage received.
PHASE 1: EACH ONE ON THEIR OWN
The fight begins with a confrontation against Malkomud and Rockie simultaneously. By the way, I remind you that “avoidable” attacks are those in which the enemy has signs of weapons and elements appear above his head to indicate what type of damage we should hit him with in order to prevent him from carrying out said attack.
Malkomud Attacks:
- Throw Spike : A very basic attack in which we will throw a spike at a distance to one of our characters, it blocks just when it is going to hit, there is nothing else.
- Palazo (avoidable) : Malkomud will make a huge jump and jump on one of your characters. Upon impact with the character, it will bounce on him to fall on top of him again and after this it will bounce again, only this last time it will be slower. You will have to try to protect yourself from the three blows that will hit.
Rockie attacks:
- Hit : Rockie will approach one of your characters and raise his two front paws and then hit the ground hard, at which point you will have to block.
- Ragemandra (avoidable) : It will approach one of your characters and literally eat it (you can’t do anything to avoid it), after which it will chew it a little and spit the swallowed character against one of the other characters on your team. This will cause damage to both characters that you can reduce by pressing the action button just as they are going to hit.
PHASE 2: MALKOMONTADO
As soon as you defeat one of the two bosses, Malkomud will ride Rockie and begin this second and final phase of the encounter. Now the boss will be a single entity called “Malkomontado”.
These are the attacks that they will now carry out together:
- Tail Swipe : Rockie will approach a character on the team and swing his tail which of course we can block as usual. Be careful because when the battle progresses a little, she can perform this same attack but hitting the entire group.
- Geo-breath (avoidable) : The same as the previous case, the lizard will approach us, only this time it will spit green breath at us. This attack is very difficult to dodge correctly because it has its trick, you will have to block just when the breath hits you and again practically instantly, so you will have to make two blocks in a row (not very fast, but leaving very little time between blocks). and blocking).
TIPS FOR BATTLE
In the first phase, you should focus on Malkomud because he has less health than Rockie (he falls quite quickly actually). Also, keep in mind that in this first phase you will have to attack with physical damage to Malkomud and with elemental damage to Rockie, but since we recommend that you go for Malkomud first, it will be better that you focus only on hitting him with physical attacks . This way you can also save MP and Combo Points for the second phase.
In the second phase there will be no doubts because we will have to attack the entity created by the union of the two bosses and keep in mind that you will cause more damage through elemental attacks, so you know what you have to do. Beyond this, little else can be said about this battle, use the Combo Points wisely as always (Restoring Light always comes in handy when things are tough) and heal yourself mainly using Garl’s turn since it is the character who is somewhat more capable offensively.
Oh yes, if you manage to make a good run with Valere’s Lunerang in this last phase and also apply the elemental orbs, you will cause a lot of damage.
REWARDS
This is what we will get shortly after overcoming this battle:
- A Pat on the Back : Yes, that’s right, the reward will be being able to continue with the adventure and little else… what are we going to do.