 by
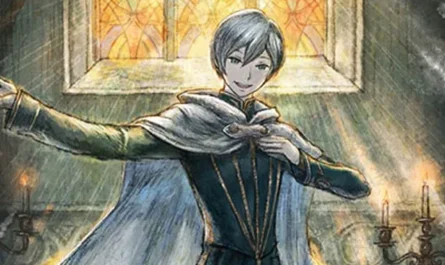
by We continue with the Blasphemous 2 Remorse , I remind you that these are the 3 bosses that we have to defeat at the beginning of the game in order to progress in the main story. Lesmes, Uncorrupted Sacristán is the last one that I have defeated and he is the one that I also recommend that you leave as the last one since in my opinion he is clearly the most difficult boss of the three.
The truth is that I liked the boss a lot, especially for the detail that when carrying out certain attacks it will cause a great tremor that will cause some bells to start ringing, something that gives this battle a pretty epic and cool touch.
But… going back to what I consider to be the most difficult of the three Remorse… well, this is mainly because in the third phase the combat gets quite complicated since we will have to face two enemies simultaneously: Lesmes and Infanta , something similar to when we faced Esdras in the first Blasphemous , only this time things are a little more complicated in my opinion.
Actually, in this sense, the combat in structure is nailed to the combat against the final boss of Scarlett Monastery of WoW (I think that was the name of the dungeon, the part of the cathedral), whoever played in his day will surely fall… «! Get up my champion!”, “At his side my lady!” (he who knows knows). What a memory I have for these things, anyway, let’s go with the guidance of this boss, that’s why we’re here!
BOSS LOCATION: CROWN OF TOWERS

We will find the boss in ” Corona de Torres “, just in the location that I marked you in the photo above with an arrow (the arrow has been horrible, but good).
To get to this purple area you will have to go along the path to the right from “City of the Holy Name” to enter the yellowish area (“Rejas y Ruina”), from there you will have to go a little to the right and go up as soon as the map allows it. You will end up arriving at the green area (“Coro de las Zarzas”), from there you can already see the exact path in the photo above.
Keep in mind that to get to the boss you will have to go around “Corona de Torres” a lot and you will have to previously get the weapon “Pray to the Dawn” (the one-handed sword) unless it is the one you chose at the beginning, of course . You will find the weapon in this area as well.
HOW TO DEFEAT LESMES, UNCORRUPTED SACRISTAN
Do not trust yourself because at first it seems that things are going to be very simple and the combat does not really get complicated until we reach the third phase.ad
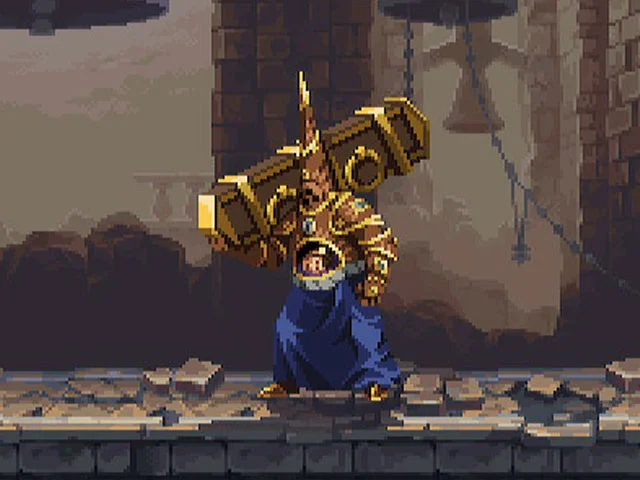
PHASE 1: LESMES
We will start facing Lesmes alone, this part is quite simple, so the key will be to do it as perfectly as possible to be able to go less in a hurry for the third phase , which will be where we will really suffer.
- Summon Pillars of Fire : He will hit the ground with his coffin and after this several large pillars of fire will emerge in various areas of the combat zone. It is very easy to see where the pillars will appear because before they emerge, fire-like marks will appear on the ground. The idea is, of course, that you do not place yourself on one of these marks. If you have time, you can place yourself between the gap between the pillars that is closest to the boss to be able to hit him a few times between the end of the attack; This is very key to give it a few blows safely.
- Coffin Charge : Typical charge attack in which he quickly moves towards us while carrying out an attack in this case with his coffin. Dash past him or just jump so he doesn’t hit you . After dodging, take the opportunity to attack him a bit. This is the attack that makes it not very viable to spend too much time hitting him in melee (except when he executes his attacks), since it is difficult to anticipate if we are not at a reasonable distance from the boss and the truth is that he does a lot of pupation with this hit.
- Levitation + Fire Pillar: Lesmes will start to levitate trying to get on top of us, which we must avoid since after a short time he will fall to the ground and summon a pillar right where he falls. He will carry out the attack several times and since the pillars take a while to disappear, well, some will accumulate. You will have to be very careful with the pillars and try to avoid being “cornered” with them (their thing is that you take the boss where you want him to put the pillar and dodge just when he is going to launch himself down to prevent them from hitting you). harm). Just when he reaches the ground and summons a pillar, take the opportunity to hit him a bit (if you go with Verdict, the weapon that I recommend the most, you better do a jump attack or you won’t have time to hit him as he levitates from new; when he’s in the air you can also hit him a bit, but don’t freak out too much either). He will do the attack 3 times in a row, when he’s done hit him a bit, but don’t stay too long with the boss around or you might eat a Coffin Charge. Also keep in mind that if you get cornered and you are going to eat one pillar yes or yes because the other is blocking your way, you can do adash to get through it (you have to rush that dash a lot to not take damage, but you can).
- Flying Coffin Mode : I’m not very clear about the logic of this attack, but hey, I’ll tell you how you have to dodge it and that’s it. Suddenly the coffin will begin to levitate (Lesmes gets inside, I think?) and it will have some fireballs that will orbit around it. The best thing you can do here is to sneak into the gap between the ring of orbiting balls and the boss and take the opportunity to hit him a few times (you may have to jump to avoid eating the balls below). There will come a point where the pellets will stop, run out of there when that happens because after a short time the pellets will shoot towards the boss, so if you stay “inside the ring” you are very likely to take a hit ( take advantage of the gap between the balls to escape through there).
As soon as you get all of his health down, the next phase will begin.
PHASE 2: SLEEPING INFANT

Lesmes will leave her coffin on the ground and the Sleeping Infanta will emerge from it. Ok, the first thing you have to do as soon as you defeat Lesmes is to quickly go and hit his coffin as much as you can (use your most damaging abilities/hits, what you’re looking for is ” Burst Damage “, do as much damage as you can in a short amount of time). time). If you do it right, you will have vented half of the Infanta’s life between the time she leaves.
The Sleeping Infant only has two attacks:
- The Little Arrows : The Infanta will summon 6 little arrows that will orbit around her and she will launch them at us. You will have to dodge them by moving, using the dash or jumping (it will depend on where you throw them, how many you throw… you know). When there are few left you see preparing to be close to her since when she launches her last one you are interested in hitting her as much as you can between summoning another 6 new arrows (thus in a loop).
- Charge : A very basic charge attack. You jump over or dash , as you like.
The Infanta falls very fast and is not very dangerous, but as soon as you defeat her she will revive «Lesmes» and also heal herself for all life; Yes, now is when the party begins.
PHASE 3: LESMES + INFANTA

You will have to face both at the same time and both will start with the life to the maximum again. Separately they are not very complicated, but together things are very complicated. As if that weren’t enough, Lesmesadwill boost a bit:
- Levitation + Pillar of Fire + : Now it will not only make 3 attacks, it can do many more in a row, so it will be much more difficult to prevent it from cornering us with its pillars and it will be very relevant that you learn to pierce the pillars with the dash without taking damage .
- Flying Coffin Mode + : He will perform this attack for longer and move more across the screen. This is even good since it will allow us to hit more or less safely (we will have to continue to be very careful not to receive damage from the balls while trying to stay within the “ring”), although it is true that Infanta can complicate a little things.
- Joint Charge : Lesmes will stand on one side of the screen, Infanta on the other, and they will launch a charge simultaneously. Dodge it with a jump and voila, it’s pretty simple.
Lesmes is quite manageable, but with Infanta bothering with her little arrows things get quite complicated. The idea is that you ventilate Infanta very quickly trying to survive since she falls quite quickly and as long as they are both alive it will be difficult for us not to die. Focus on finishing her off quickly, but of course Lesmes won’t make it easy for us; This does not mean that you stop attacking Lesmes, if it is impossible for you to access Infanta at that moment, take the opportunity to attack Lesmes in the meantime… but your priority has to be the Infanta .
As soon as you are alone with Lesmes again, calm down and be patient, surely at this point Penitente has become a Christ (pun intended) and you will pay dearly for making a mistake at this moment. Remember that Lesmes’s move kit has changed a bit in this phase.
TIPS
I highly recommend that you use Verdict (the two-handed weapon) for its good damage and tremendous range (you will find it by “Holy Graves, the area of the Great Preceptor Radames “), both of which will be of great value in this battle (avoid use the ground attack, it’s a bit slow and leaves you very exposed; use the air attack). Of course, the fire attacks are better to use to hit the Infanta.
Little more to say because in the phases and attacks part we have already clarified a lot which strategy is the best to follow, but, when it comes to healing, the best moment is as usual between one attack and another; in the third phase when you have both alive it will be hard to find a good time to heal, but be patient until chance creates a safe time to heal.
REWARDS
This is what we will get by defeating him:
- Tears of Amends : 2,000.
- 1 Mark of Martyrdom : They serve to increase the capacity of the Table of Favors and to improve the Penitent’s weapons.