 by
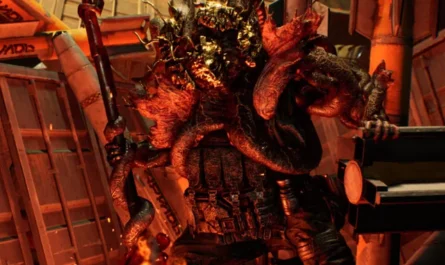
by Belial is the first Spire 4 boss that we will face in Stellar Blade and stands out for his incredible regeneration capacity and his powerful and fast blows. He is a Naytibo who fights with two swords simultaneously and the truth is that he is very skilled with them.
This boss has two different confrontations. The first one doesn’t have much of a mystery since it will be a fairly short battle because when you lower his health by more or less 20-30% he will lose an arm and decide to flee. The real encounter will be the second in which, by surprise, he will regenerate his arm and here we will have to defeat him until the end.
Although the boss has a certain surprise that I will explain to you below, the truth is that the combat is not too complicated.
BELIAL’S ATTACK GUIDE
This boss has three phases. At first it seems that it will not be like that until you realize that when you lower the first life bar it heals for all its life and attacks again with new movements.
PHASE 1
The boss will start with these attacks:
- Standard Combo : The typical combo of physical attacks of a lifetime. Generally he will make 3 consecutive blows to which you must parry ( each one). Sometimes he will make only 2 hits.
- Furious Combo (Red) : The boss will briefly acquire a reddish tone and launch a combo of several very fast blows, again we will try to parry each blow by spamming the block button quickly throughout the combo.
- Yellow + Blue Combo : Combo that is somewhat difficult to avoid. It will start with a yellow blow that you must dodge, after this it will make another blow that you must also dodge and it will end with a blue attack, so be on the lookout for a forward dodge when the blue glow appears on Eve to “Blink” it and take advantage of it to hit it a good combo of blows with your sword.
- Descending Impact (Yellow) : He will begin with an upward physical blow that you can block and he will quickly jump and fall to the ground, stabbing his sword into it (this attack must be dodged, ideally with a perfect dodge). Be very careful because now he will charge a powerful area attack on the ground, so you will have to move away quickly or do a double jump + air dash before he does it.
- Powerful Grab (Blue) : As always, we will use Blink (dodge forward when the blue glow appears on Eve) and after that we will take the opportunity to land a combo of several blows.
As I mentioned a little above, the second phase will begin when you lower the entire first life bar and it is fully healed. When he changes phase, quickly move away from him as usual.
PHASE 2
You will have to lower his life again and he will acquire these new attacks/improvements:
- Bug out! : Annoying attack that we already saw in Juggernaut , although luckily this boss does it less. It is a very fast physical blow that is usually done when you are hitting him or going towards him that is almost unpredictable and that will cut off your offense while at the same time dealing damage. It’s not as much of a problem as the previous boss already mentioned because he does it very rarely, so you can ignore it directly.
- Charging Attack : Attack with the sword that he will make when he is a little away from you with which he will hit you while he approaches you and after this he can continue with some type of attack.
- Powerful Combo + (Red) : The boss will perform faster and longer combos, but nothing changes here, you keep spamming the block like there’s no tomorrow.
- Singular Slash (Yellow) : A very basic yellow blow that you must dodge. Sometimes he does it as a charge, but basically it’s the same, a single yellow hit.
- Jump Attack (Yellow) : Similar to Downward Impact from Phase 1, but here he will directly jump, impact the ground and quickly (it took time before) perform the attack in the area. My recommendation is that you do a double jump + air dash when you jump to avoid the impact.
- Deceptive Blue Attack : Be careful with this attack because it will make the typical blue glow, it will stand still for a bit and you will be waiting for Eve’s blue glow to appear to do Blink with the problem that this will not happen and the boss will grab you to hug you lovingly. You will have to move away from him / dodge him backwards or to the side and wait for him to perform another blue attack, this second is the one in which you can use Blink. To make it more confusing, sometimes Eve’s blue glow will appear on your first hit, so be very attentive to whether or not Eve’s blue glow appears during this attack.
- Purple Attack : Pay attention because in this phase it also has a purple attack, so when you see the purple glow, dodge backwards and blast it in the orange weak point with your ranged attacks.
As soon as you lower all of its health again… it will be completely cured again , sep.
PHASE 3
Here it will be the last bar that you will have to lower yourself . The combat is more or less the same as what you have already seen in phase 1 and 2, only in this case I would like to highlight a new yellow attack that it has in which it performs quite a few hits in a row, so you will have to spam the dodge button.
TIPS FOR BATTLE
It is a boss in which we are going to perform many parrys and that has combos in which it hits very quickly, so the ideal will be that you equip the Reflex-Type Exospine , which will help you in that sense and also with the perfect dodges , which the boss also has some annoying yellow attacks.

Exospines
Exospines serve to customize our combat mode in Stellar Blade as they will allow us to enhance certain offensive aspects of Eve. Here you have the location of all of them.
As a second option for Exoespina, the “Trance Beta Type” has worked great for me. In the end he is a boss that if you parry him , dodge him and in the meantime you nail him with Beta Skills and the other resources you have (Burst Skills, Tachy Mode), he falls very easily. I prefer to improve Beta Skills because these are done very often.
If you’re having a hard time, you can use the Tachy Mode trick of spamming triangle all the time in front of the boss in phase 3, he’ll stay stunned all the time and you’ll drop a colossal amount of health.